

機械学習モデルをトレーニングする

AutoML Visionにデータをインポートし、トレーニングプロセスを開始する
インポート用のデータを準備する

Google Cloud アカウントに戻り、トレーニングデータセットを AutoML Vision にインポートして演習を続けましょう。
ラベル付きの画像を追加する最も簡単な方法は、各ラベルの例を含む個別の zip フォルダをアップロードすることです。この例では、「ポジティブ」(琥珀採掘の例がある画像)と「ネガティブ」(琥珀採掘の例がない画像)の2つのフォルダ/ラベルがあります。すべての画像をまとめてアップロードし、AutoML Visionインターフェイス内で手動でラベルを付けることもできますが、それにはかなり時間がかかります。
AutoML にデータをインポートする(1)
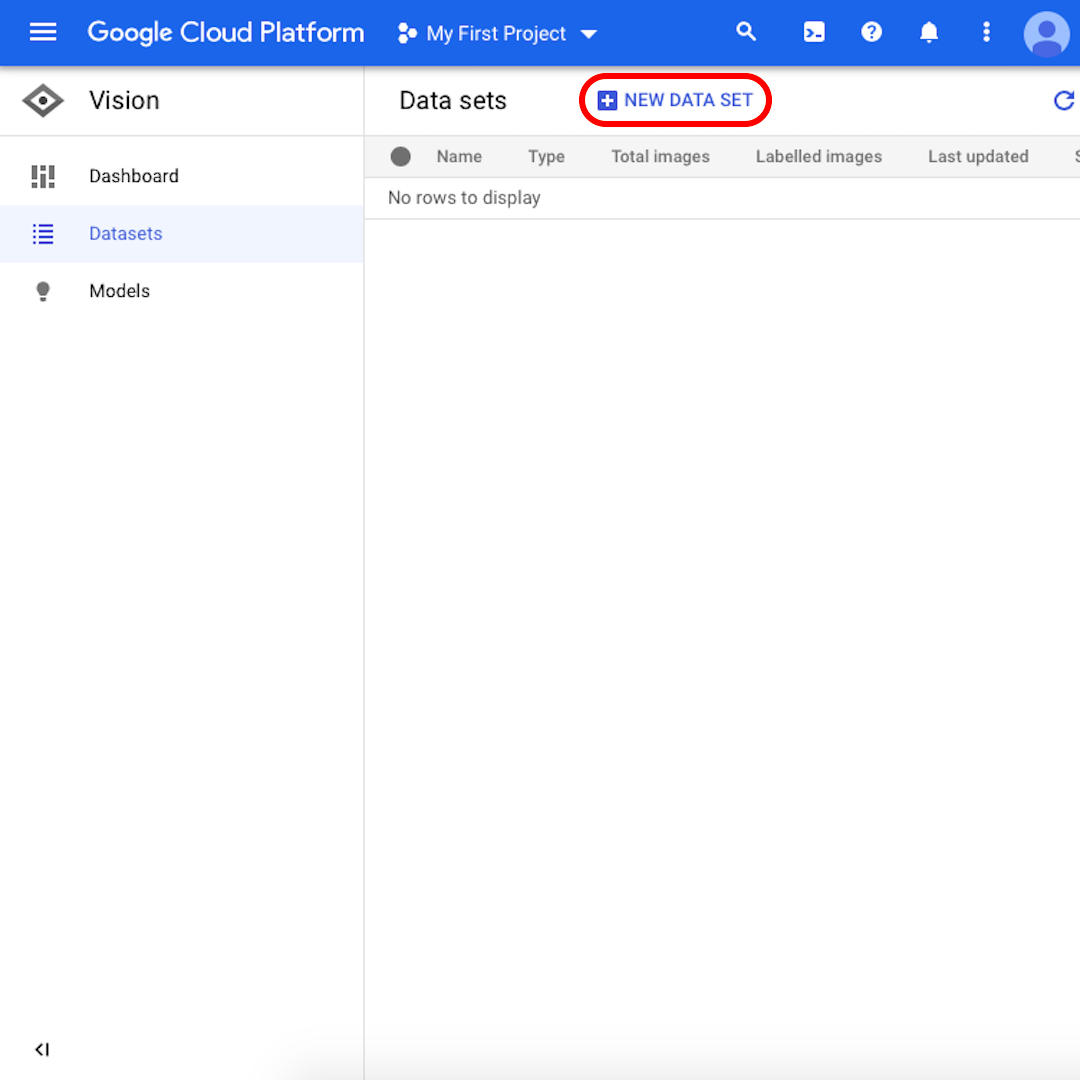
インターフェイスから、「新しいデータセット(New Dataset)」をクリックします。
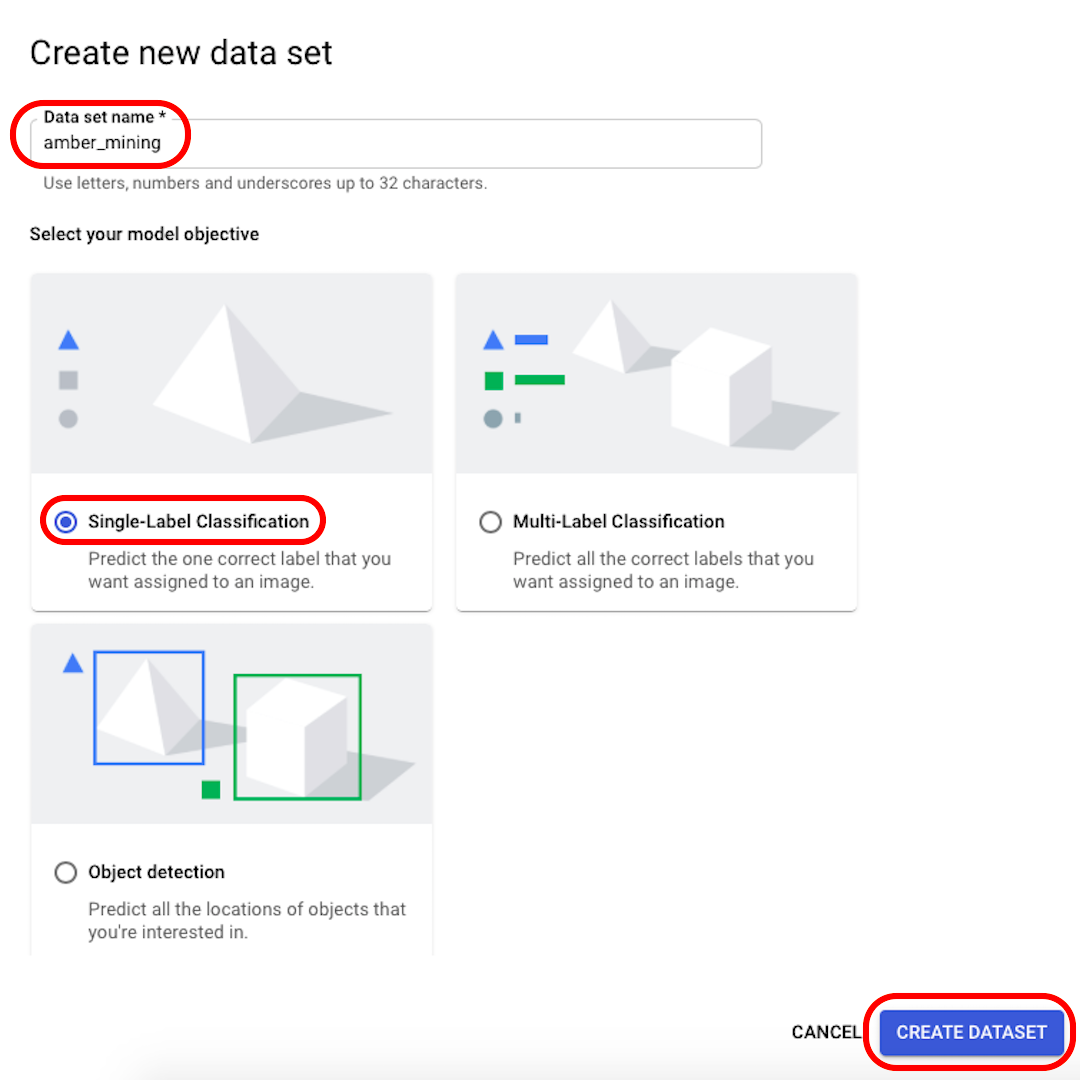
データセットの名前を認識可能なもの(「amber_mining」など)に変更し、モデルの目的として「シングルラベル分類(Single-Label Classification)」を選択して、「データセットの作成(Create dataset)」をクリックします。
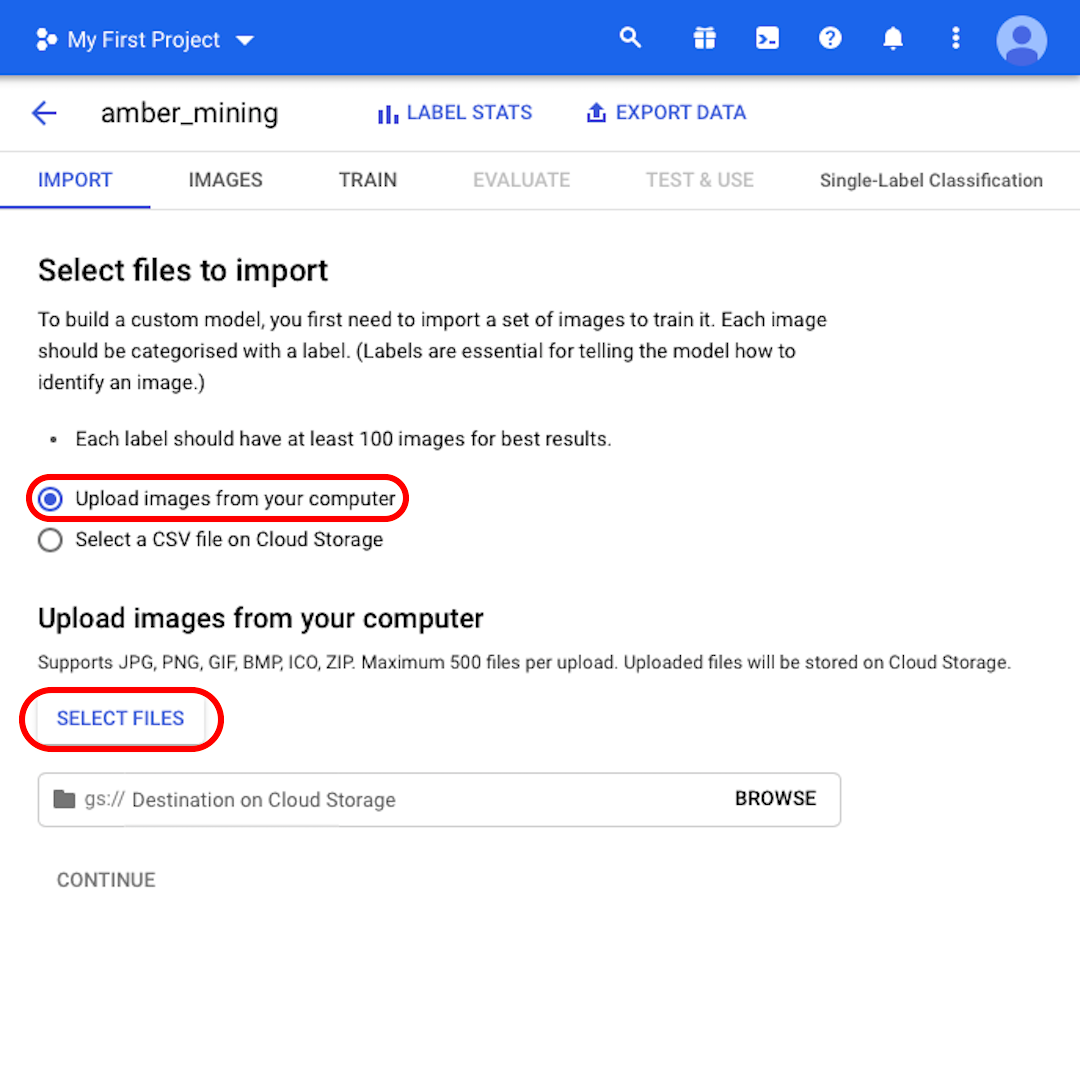
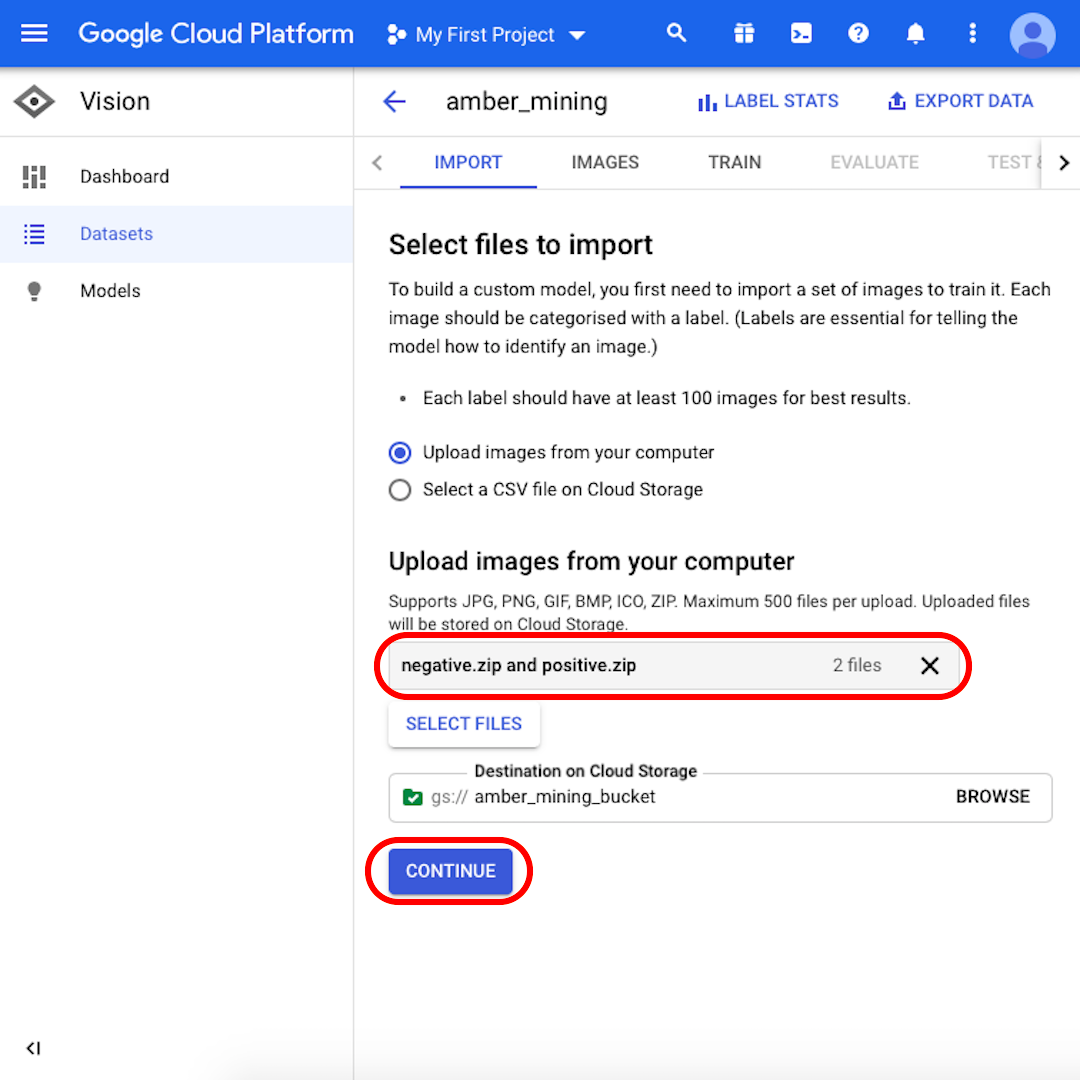
「コンピュータから画像をアップロード(Upload images from your computer)」を選択したまま、「ファイルを選択(Select Files)」をクリックします。表示されるメニューから、「positive.zip」と「negative.zip」の両方を選択します。選択した内容を確認します。
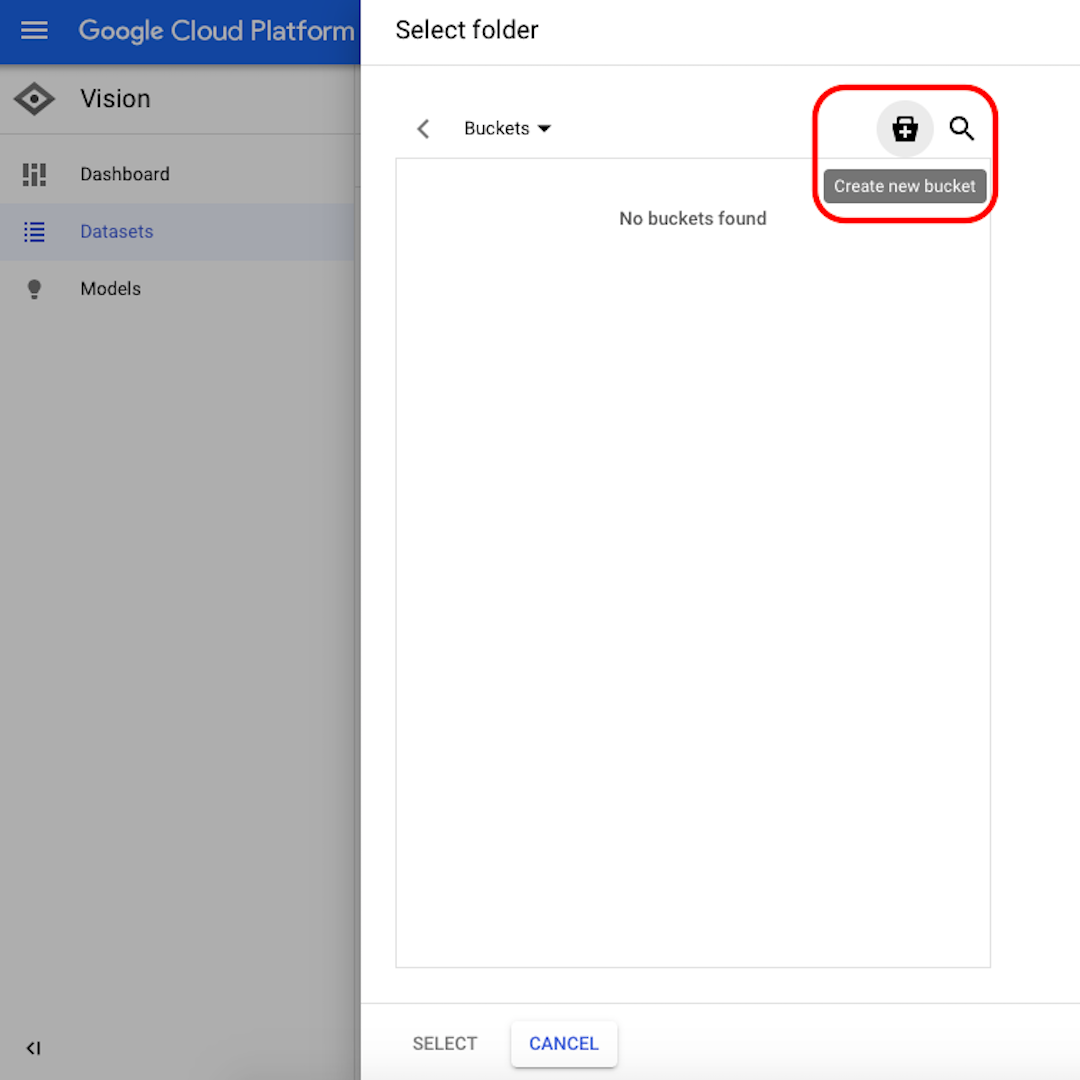
「参照(Browse)」をクリックして Cloud Storage の宛先を選択し、表示されるウィンドウで右上隅のアイコンをクリックして「新しいバケットを作成(Create new bucket)」します。
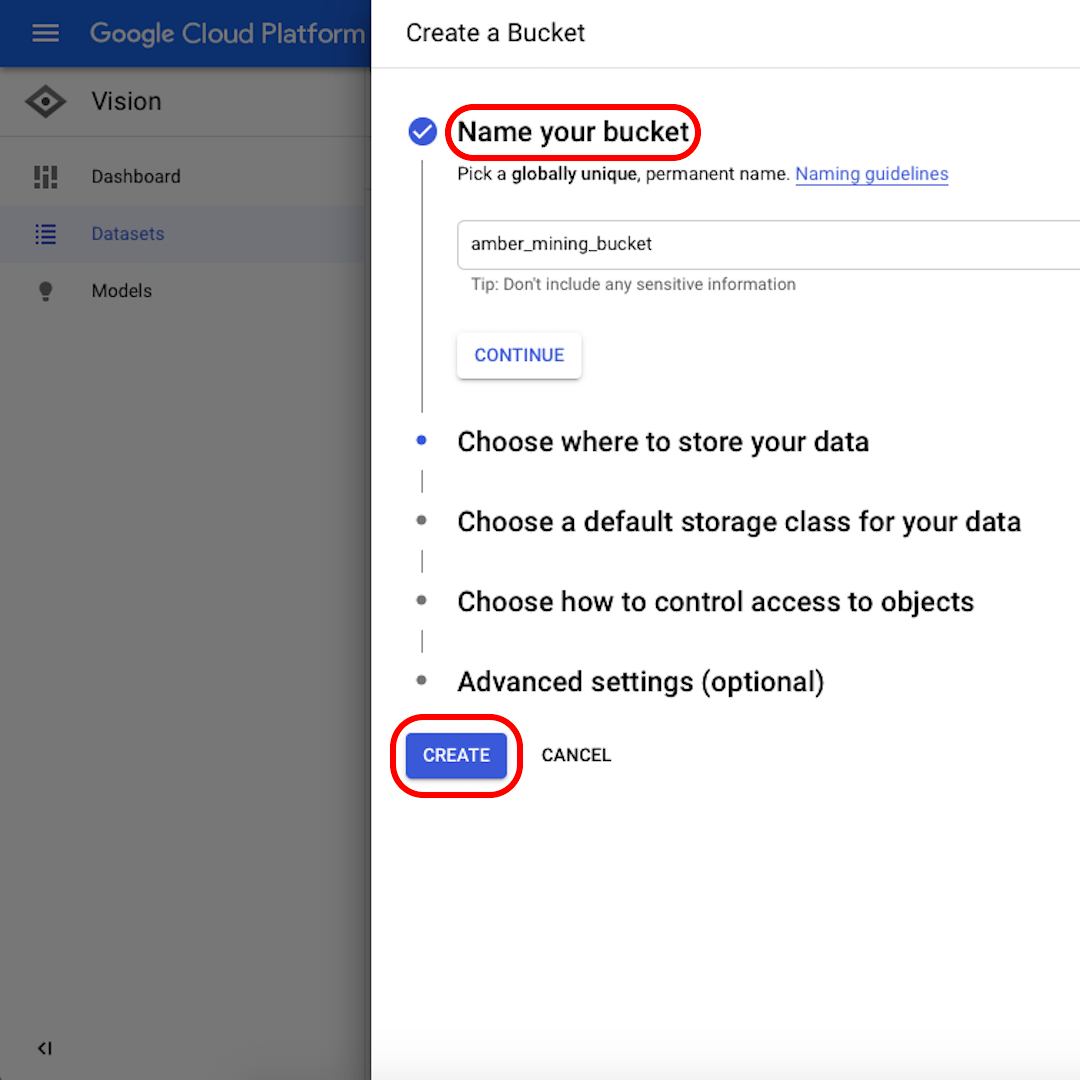
バケットに名前を付けます。この演習では、次のオプションで何を選択してもかまいません。次のウィンドウで「作成(Create)」をクリックしてから「選択(Select)」をクリックします。
AutoML にデータをインポートする(2)
これで、トレーニングセットのアップロードの準備が整いました。
「negative.zip」と「positive.zip」の両方がグレーのボックスに表示されていることを確認し、「続行(Continue)」をクリックします。画像がアップロードされるまで、接続の速度に応じて、数秒から数分待ちます。
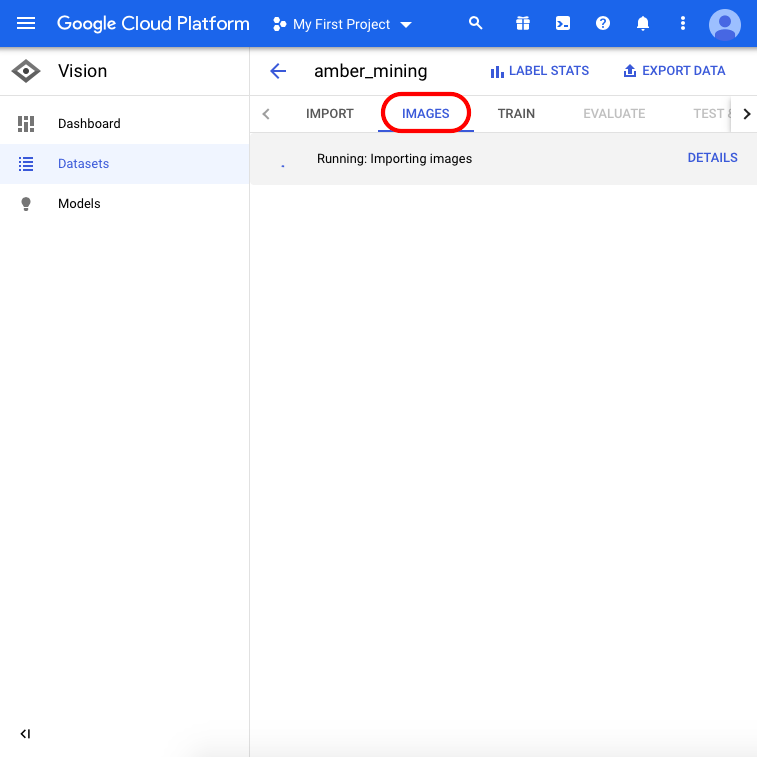
アップロードが完了したら、ページ上部のメニューから「画像(Images)」をクリックし、インポートプロセスが完了するのを待ちます。最大30分かかる場合があります。
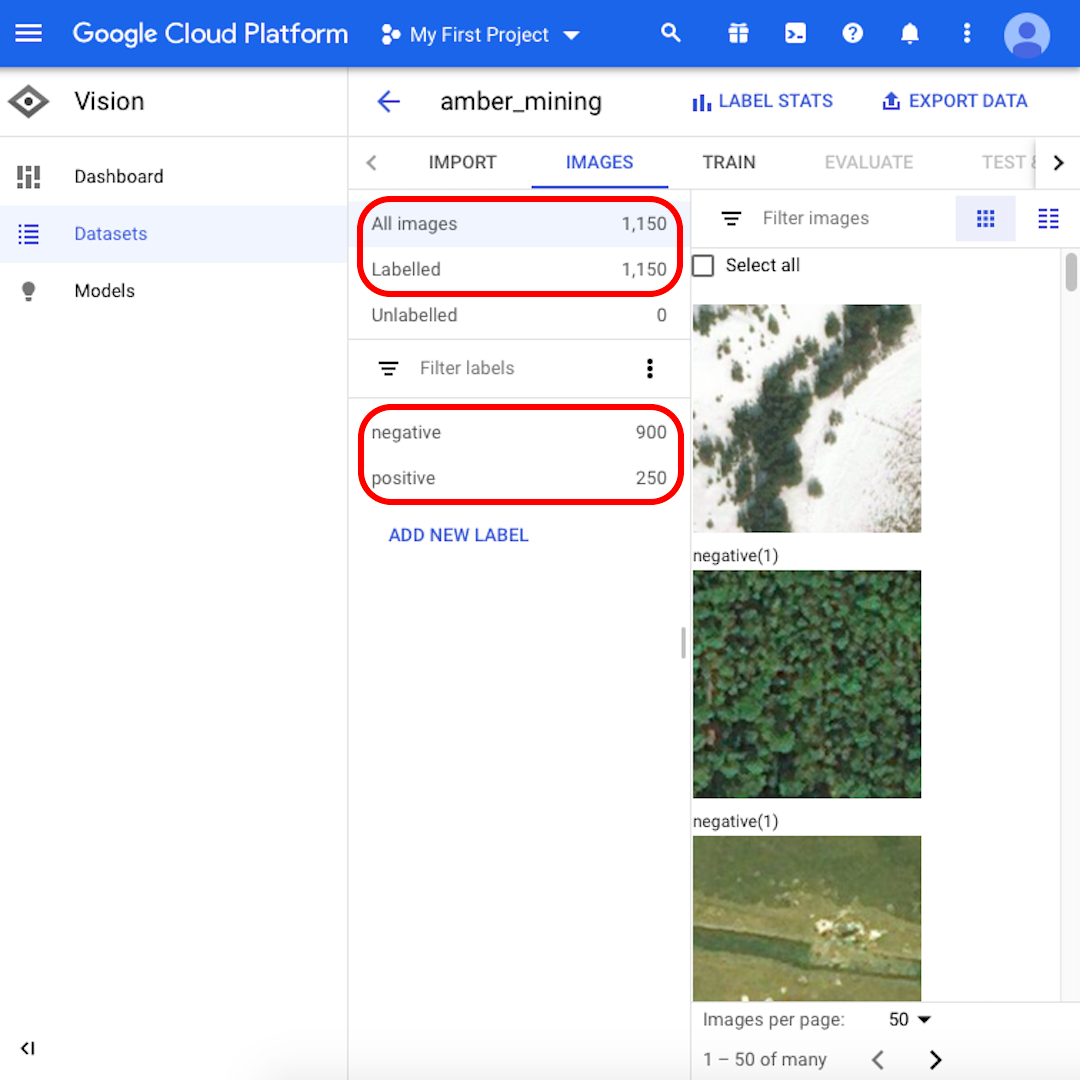
インポートプロセスが完了すると、メールで通知されます。Google Cloud Platform には、インポートされた1,150枚の画像、900枚のネガティブと250枚のポジティブが表示されます。
機械学習モデルをトレーニングする
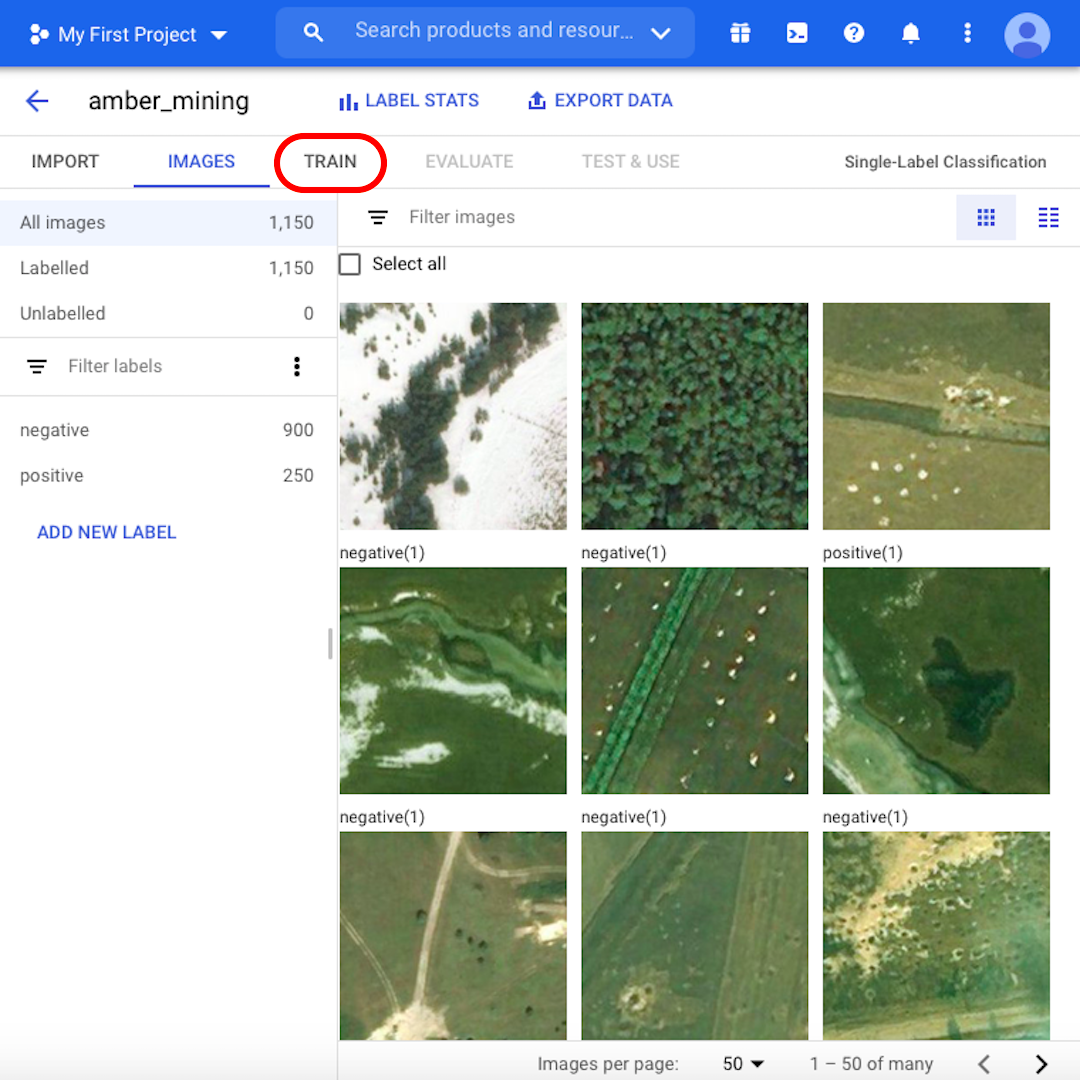
これで、トレーニングプロセスを開始する準備が整いました。ただし、まず初めに画像を参照して、データセットについて詳しく学びます。たとえば、「ポジティブ」の画像のいくつかをチェックしてみましょう。特徴的な穴、琥珀採掘の痕跡が見えますか?あなたがそれを認識できるなら、あなたのモデルもそれを行うことができます。
画像によっては、琥珀採掘の痕跡があるかどうか自分で判断するのが容易でない場合があります。次のレッスンでは、これらの境界線の例でモデルがどのように機能するかを見ていきます。続行する準備ができたら、「トレーニング(Train)」をクリックします。
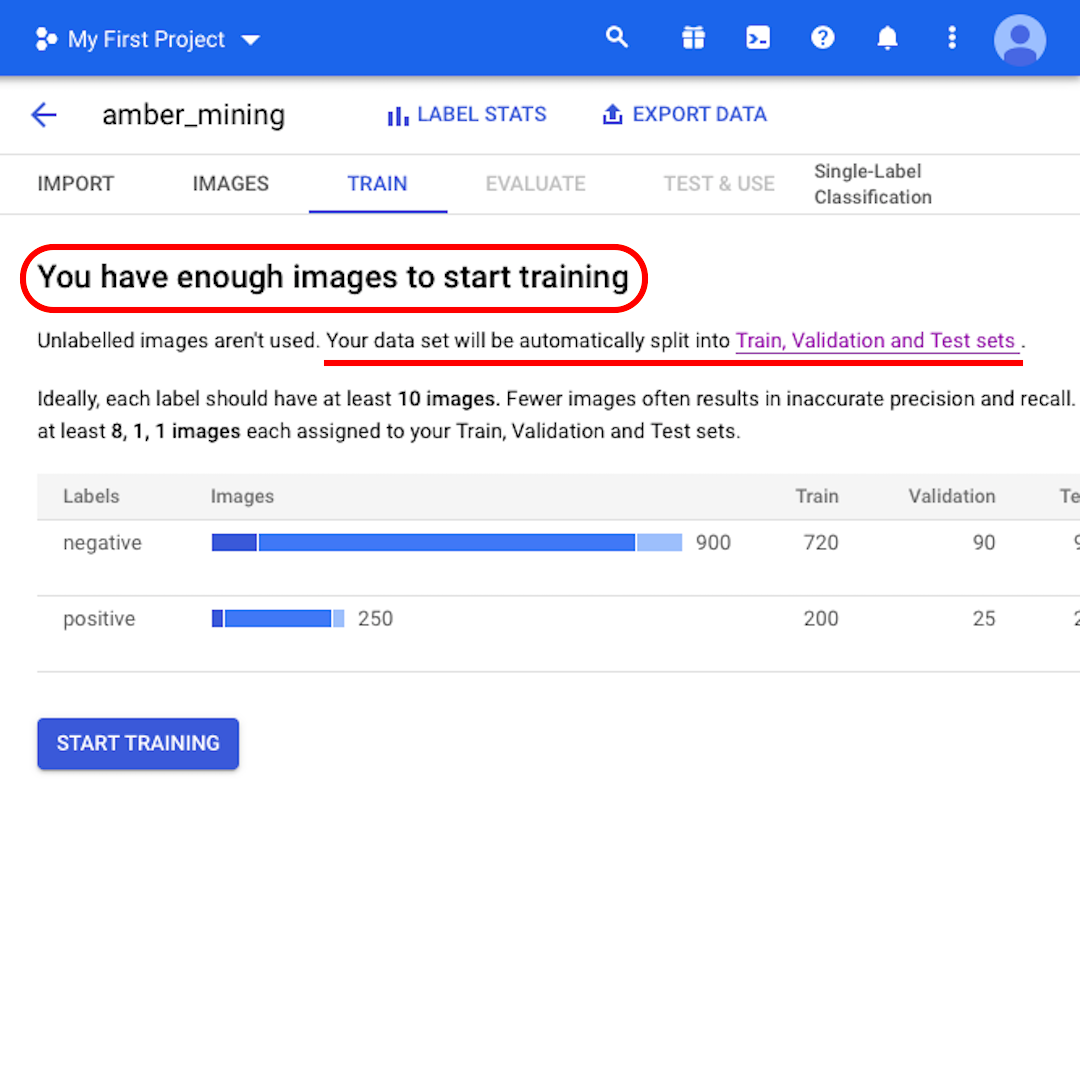
この時点で、モデルは「トレーニングを開始するのに十分な画像を持っています」と表示します。また、「データセットは自動的にトレーニング、検証、テストセットに自動的に分割されます」と通知されます。 それが何のことなのか見てみましょう。
トレーニング、検証、およびテストセット
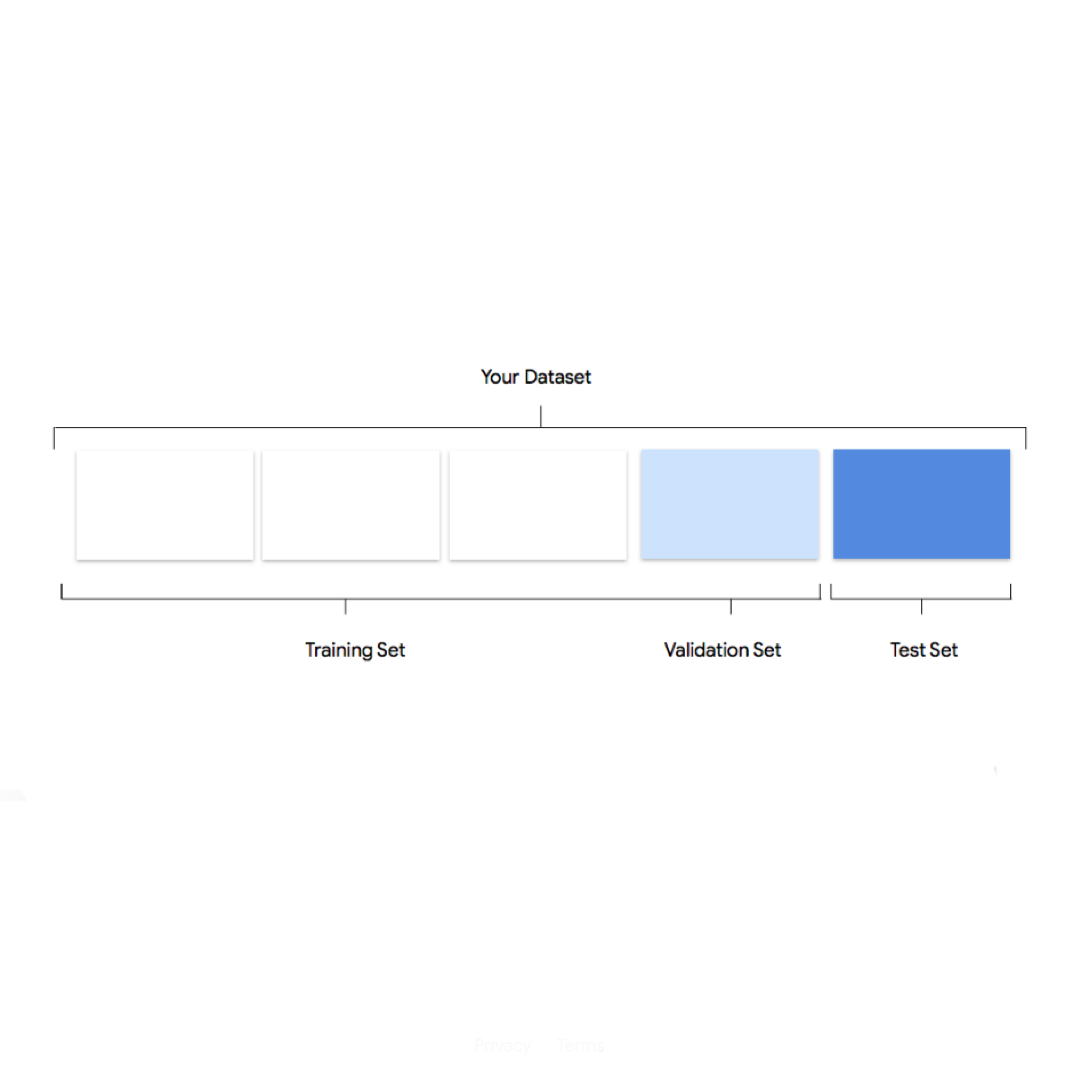
データセットを3つの別々のセットに分割する理由は、いくつかの画像を横に置いておくことで、モデルがトレーニングされた後に、トレーニングされていないが適切なラベルがわかっているデータを使ってその性能を評価できるようにするためです。
各セットに保持する画像の数を指定しない場合、AutoML Vision はトレーニングに80%、検証に10%、テストに10%を使用します。
- トレーニングセットは、モデルが「見ている」ものであり、最初に学習するものです。
- 検証セットもトレーニングプロセスの一部ですが、モデルのハイパーパラメーター、つまりモデルの構造を指定する変数を調整するために、個別に保持されます。
- テストセットは、トレーニングプロセスの後にのみステージに入ります。これを使用して、まだ確認されていないデータでモデルの性能をテストします。