

Google Historical Imagery: Google Earth Pro, Maps and Timelapse
Find out where a photo was taken and when it was uploaded.
History tells a story.
Sometimes the best way to explain the present is to explore the past. Google Earth Pro, Google Maps and Google Landsat Timelapse all allow you to access years of satellite, aerial and Street View imagery, which are an effective tool for demonstrating the development of cities, damage from natural disasters and changes in landscape over time.
Exploring history on Google Earth Pro.
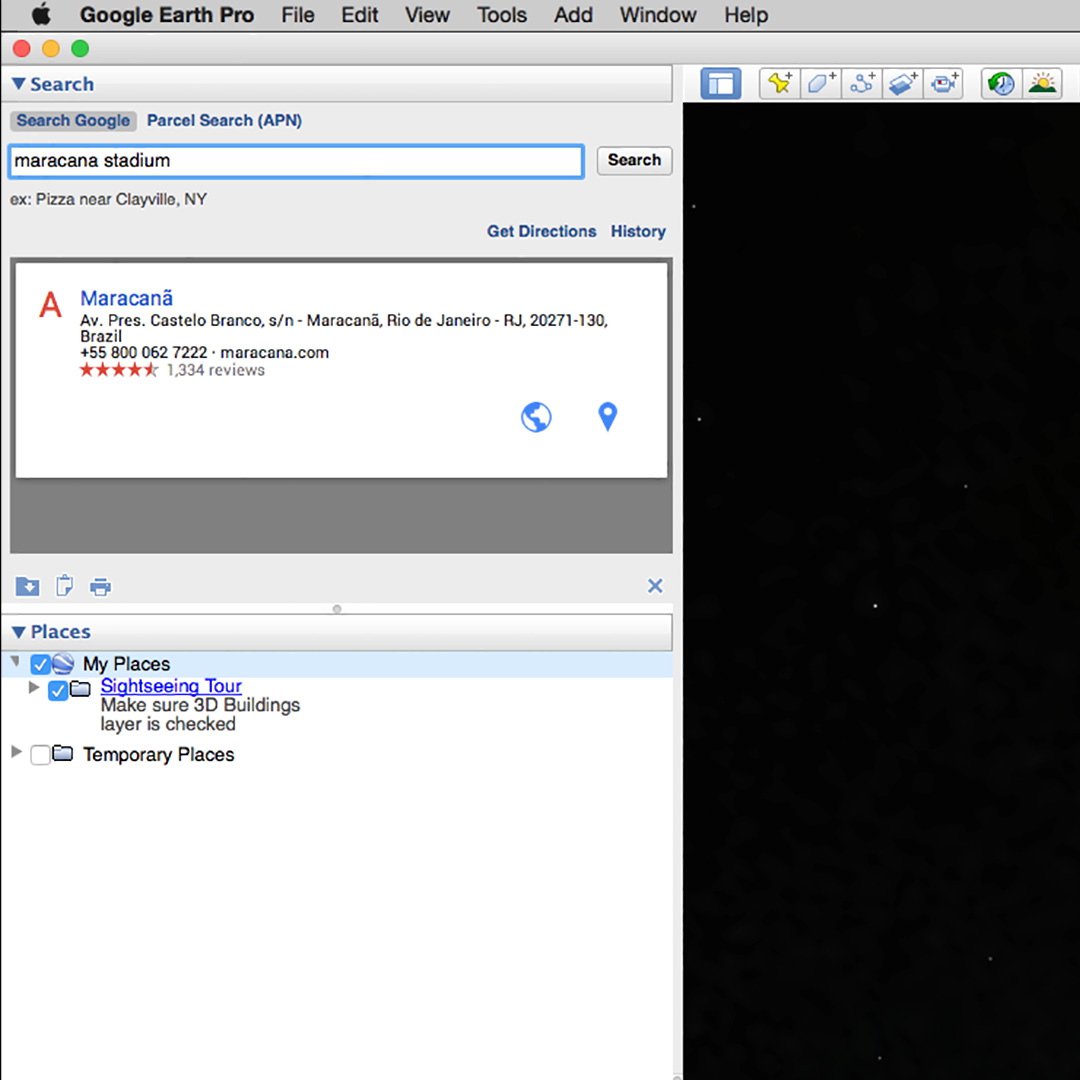
Google Earth Pro’s Historical Imagery feature is an easy way to go back in time. Let’s say you want to show the history of renovations to Rio de Janeiro’s Maracanã Stadium:
Type the stadium’s name in the search window and fly to the location.
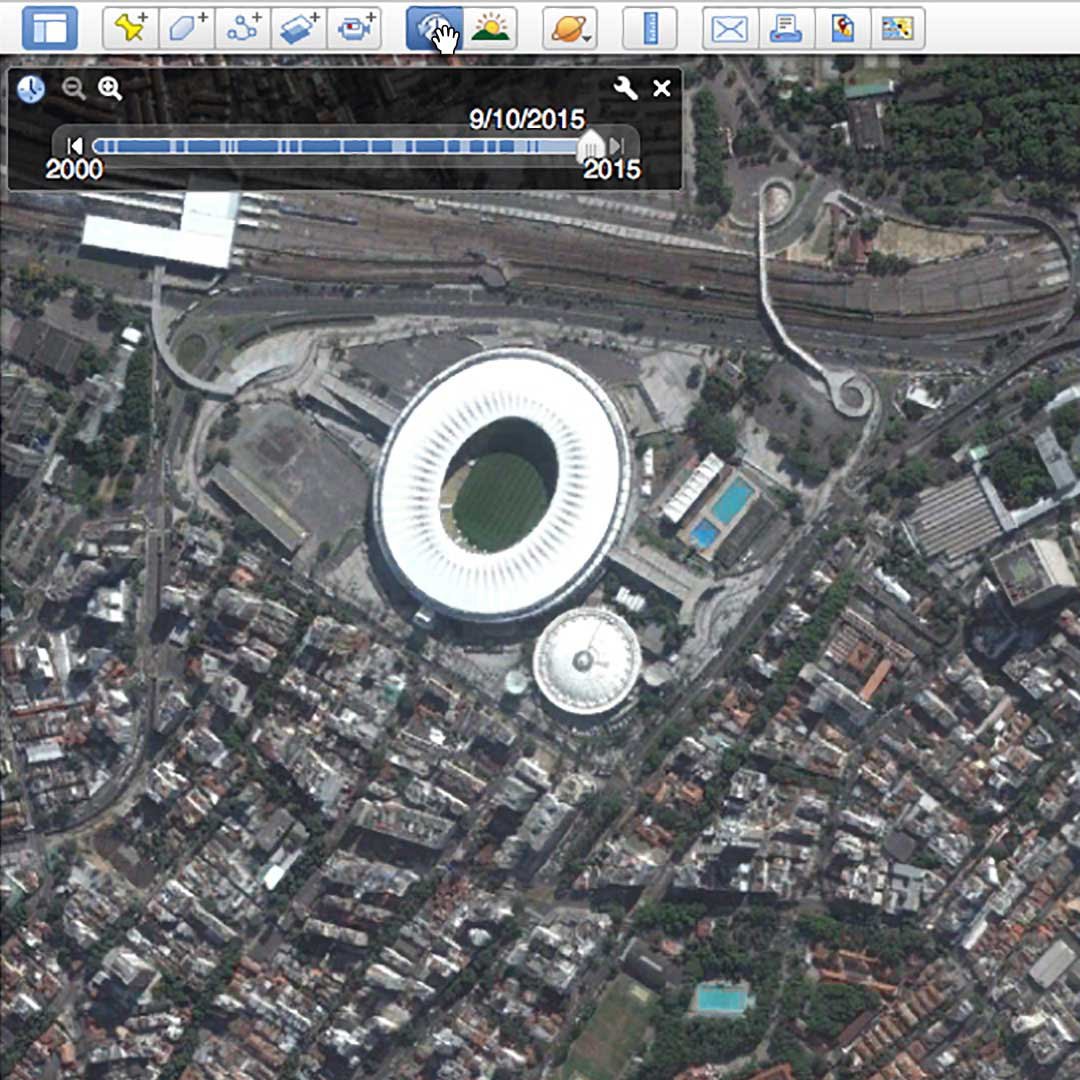
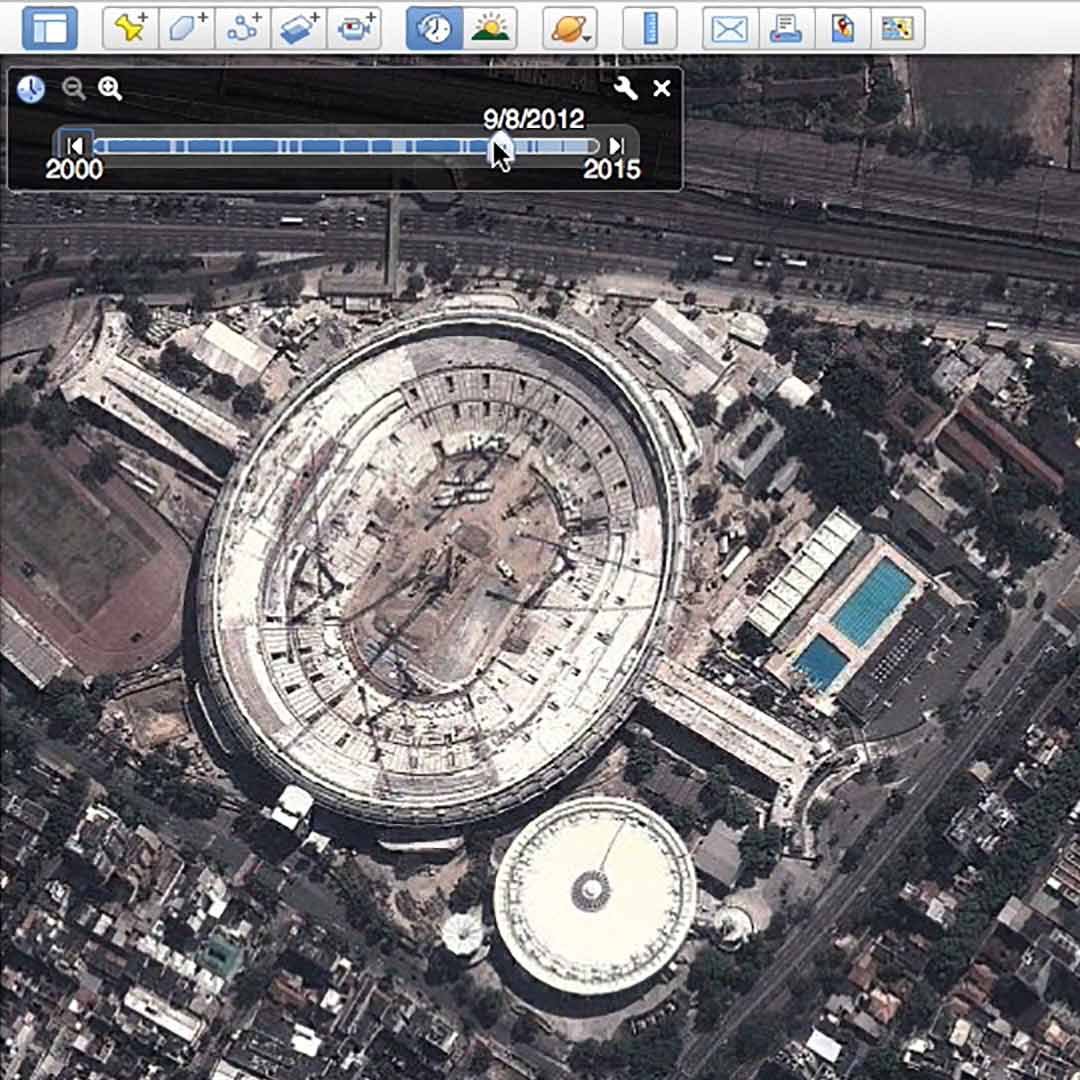
You’ll first see the freshest or highest quality imagery available. Now click the clock icon in the top menu and a time slider will appear, displaying a notch for every piece of imagery available for this view.
Move the slider all the way to the right to see if any fresher imagery is available, and move it to the left to see imagery from the past. The day, month and year of each piece of imagery is displayed within the slider. Coverage and availability of images will vary depending on the location.
Exporting still images and video.
Google Earth also allows you to create and export HD tour videos for use in your stories. See our tutorials for Google Earth and Google Earth: Export High Resolution Images to learn more.
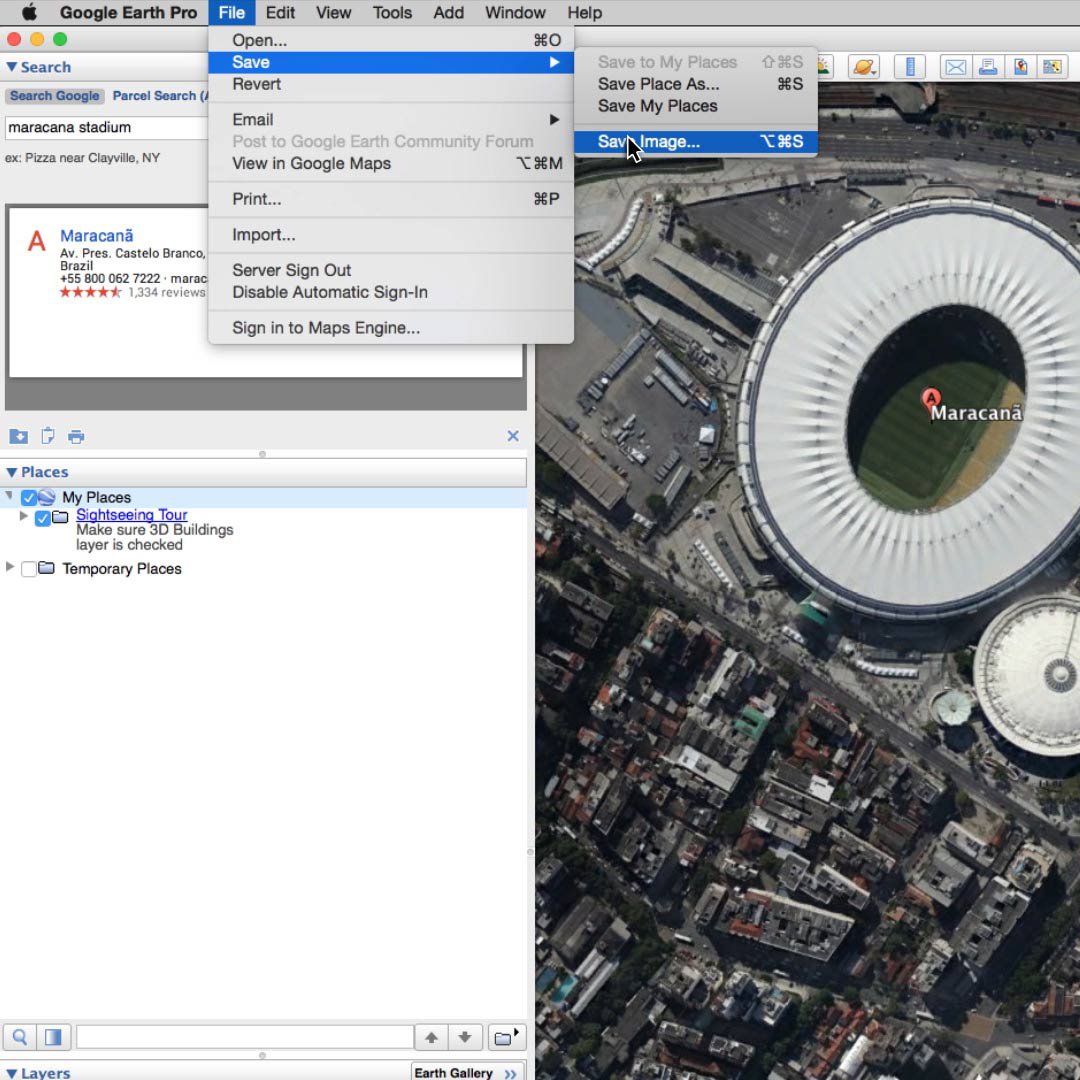
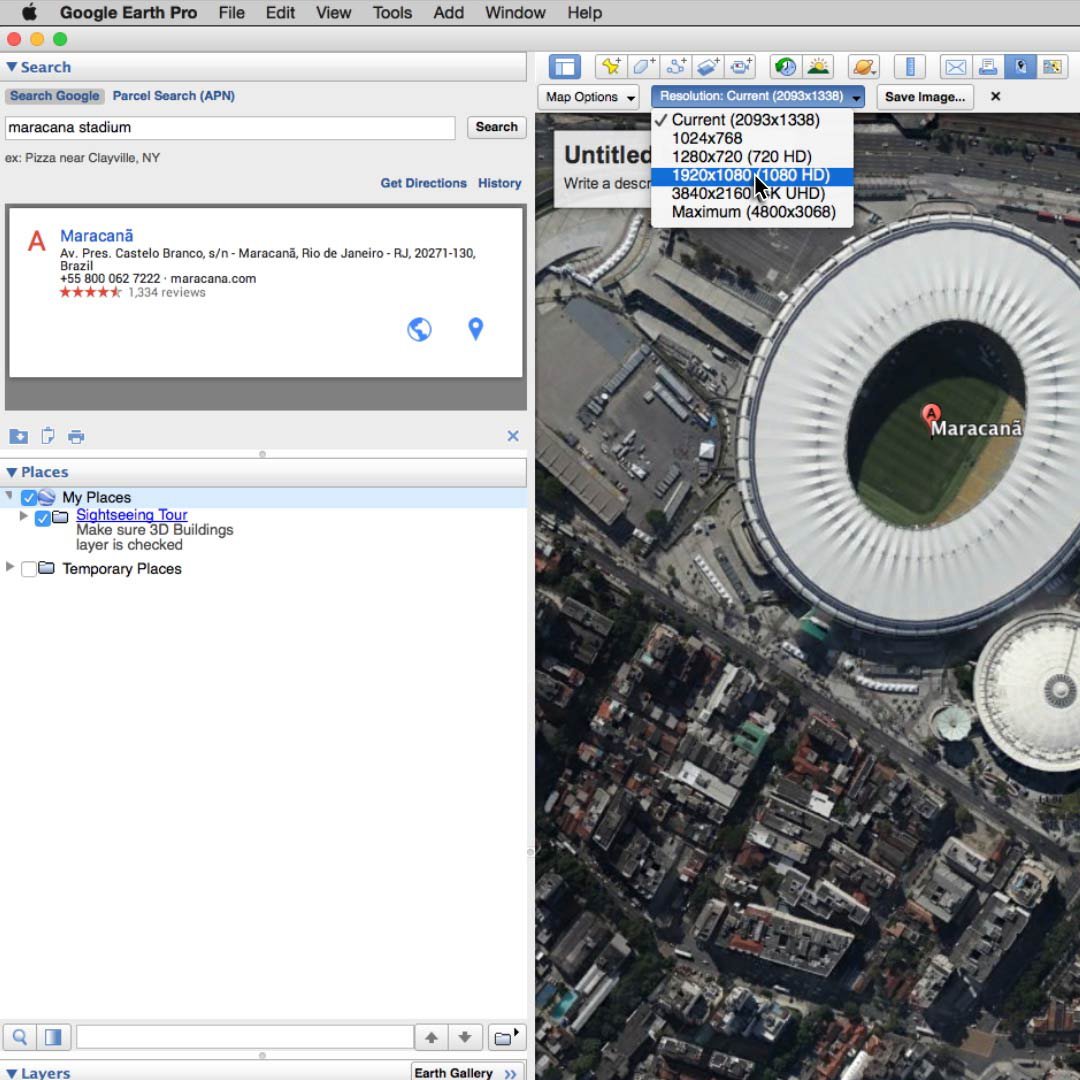
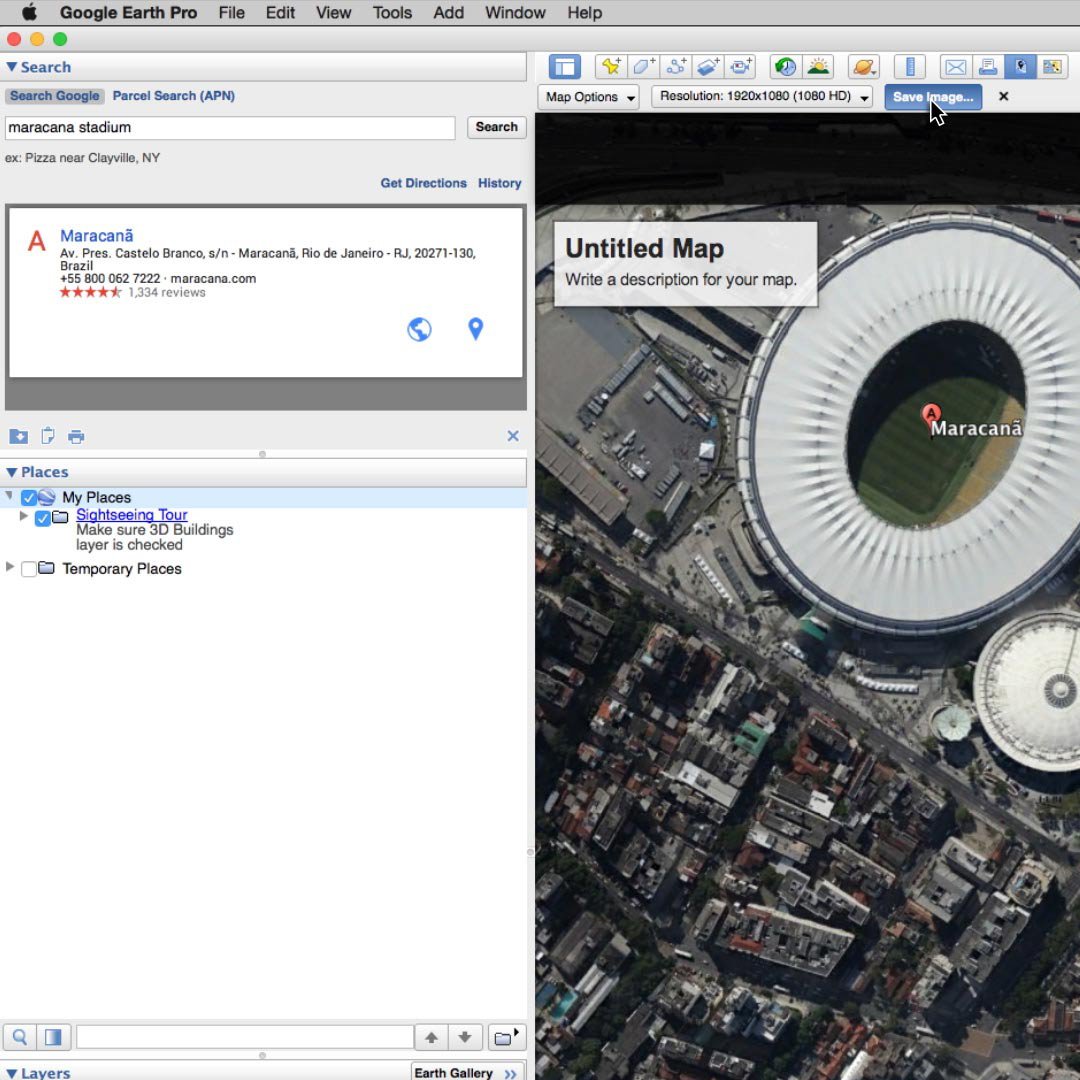
In Google Earth Pro, you can save and export high-resolution JPGs of these historical images by going to File > Save > Save Image. Buttons will appear above the map that allow you to choose the resolution of your images and keep or remove various elements on the map.
Google Earth Pro also allows you to create and export HD tour videos for use in your stories. See our tutorials for Google Earth Pro and Google Earth Pro: Export High Resolution Images to learn more.
Then click Save image.
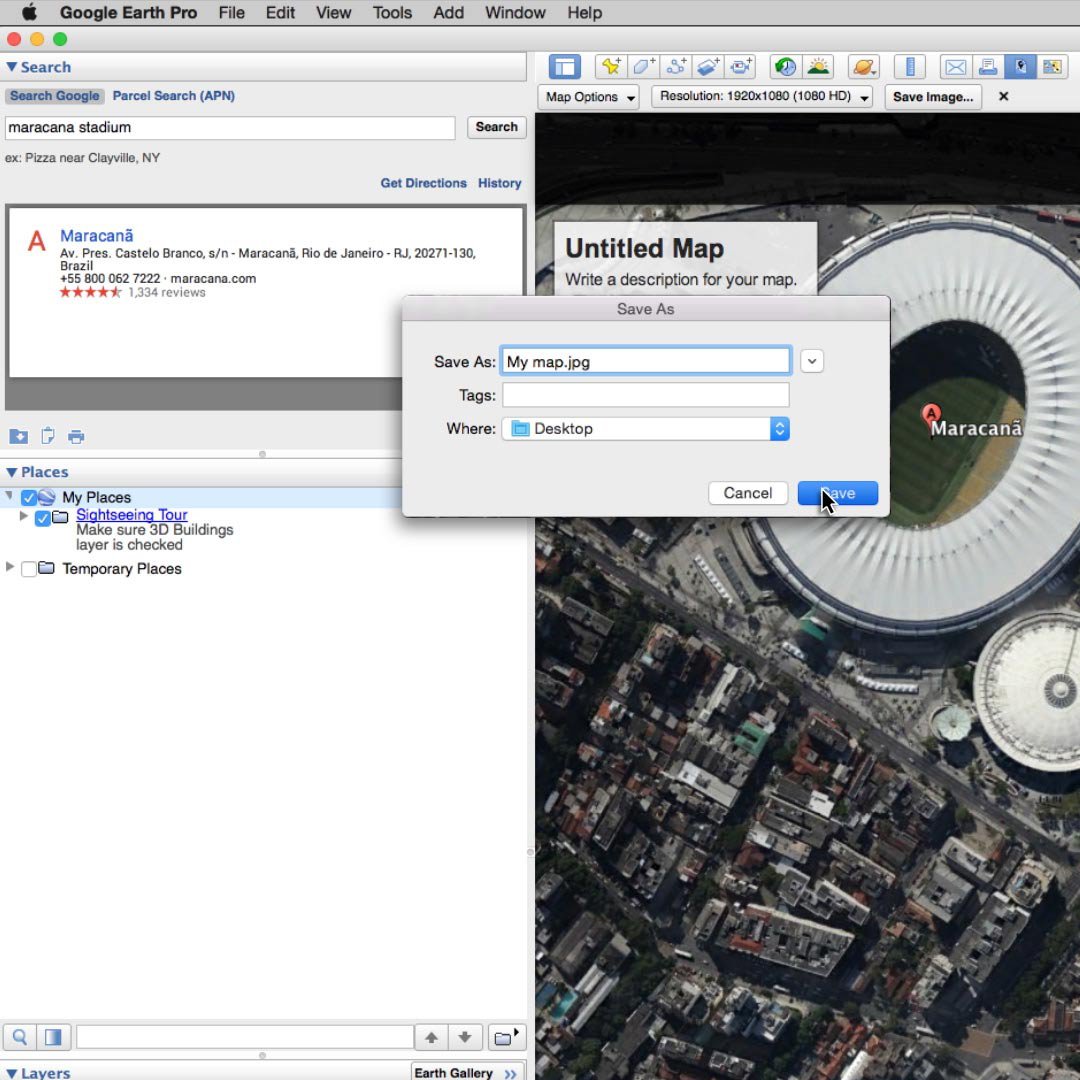
Finally, name your file and click Save.
View streets of the past on Google Maps.
Similar to historical satellite imagery in Google Earth, Google Maps for desktop allows you to access historical Street View panoramas gathered from Street View collections dating back to 2007.
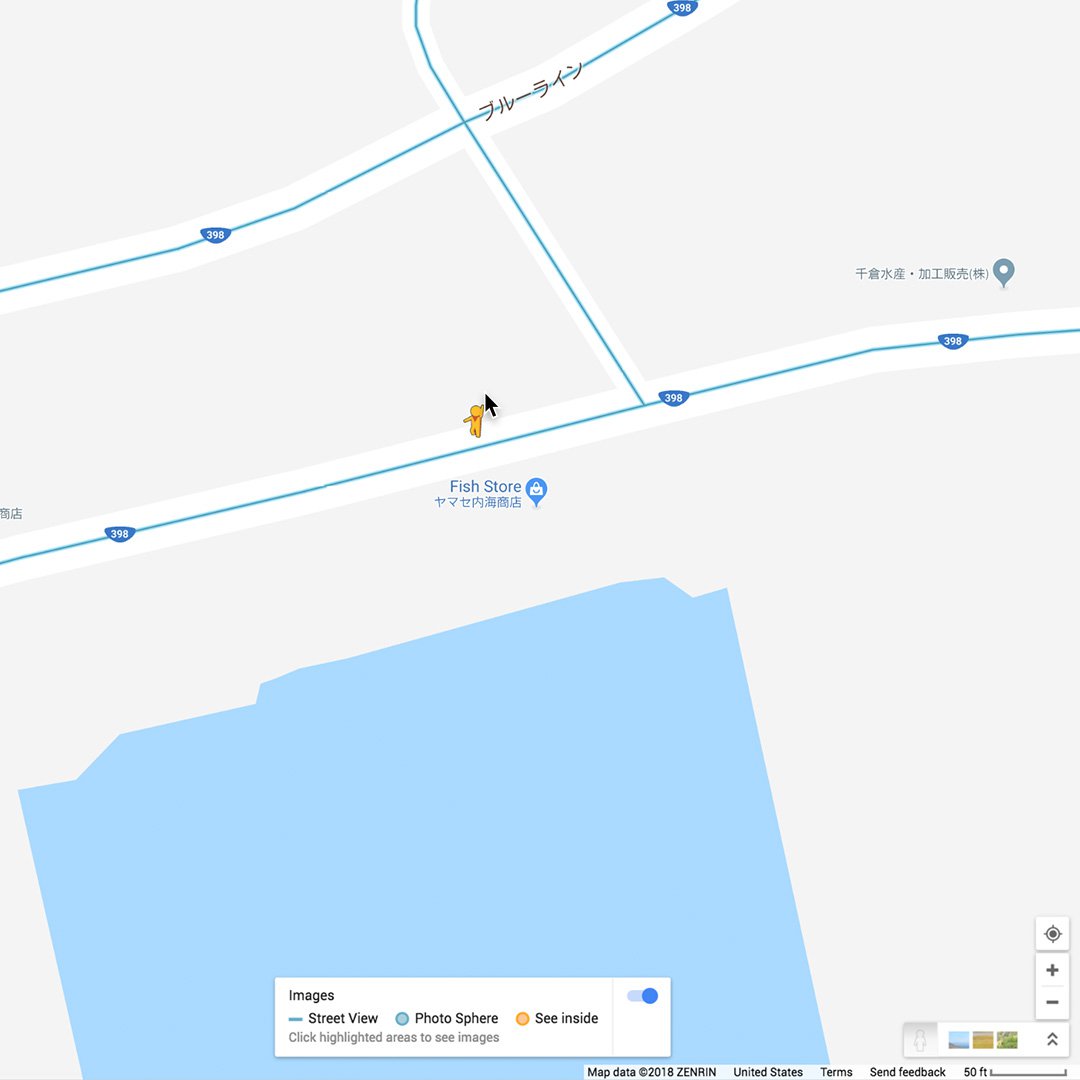
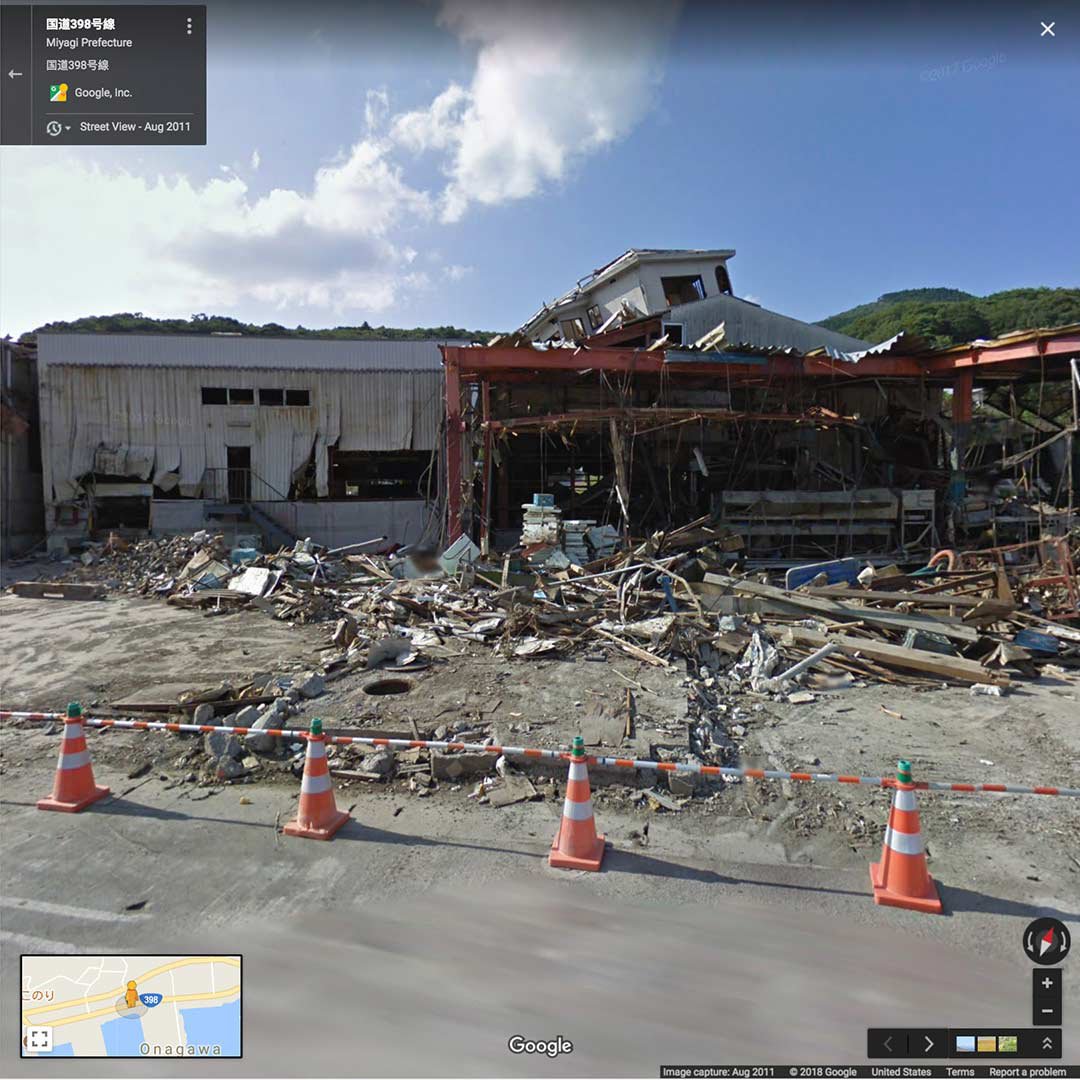
Let’s say you’re doing a story on the reconstruction of Onagawa, Japan after the 2011 earthquake and tsunami. First, type Onagawa in the search bar to fly there. Then, to enter Street View In Google Maps, grab the Pegman and drag him to one of the blue lines on the map (blue lines indicate where Street View is available on the map). When you first enter this mode, you’ll see the freshest, highest quality panorama available for that spot.
Moving through time.
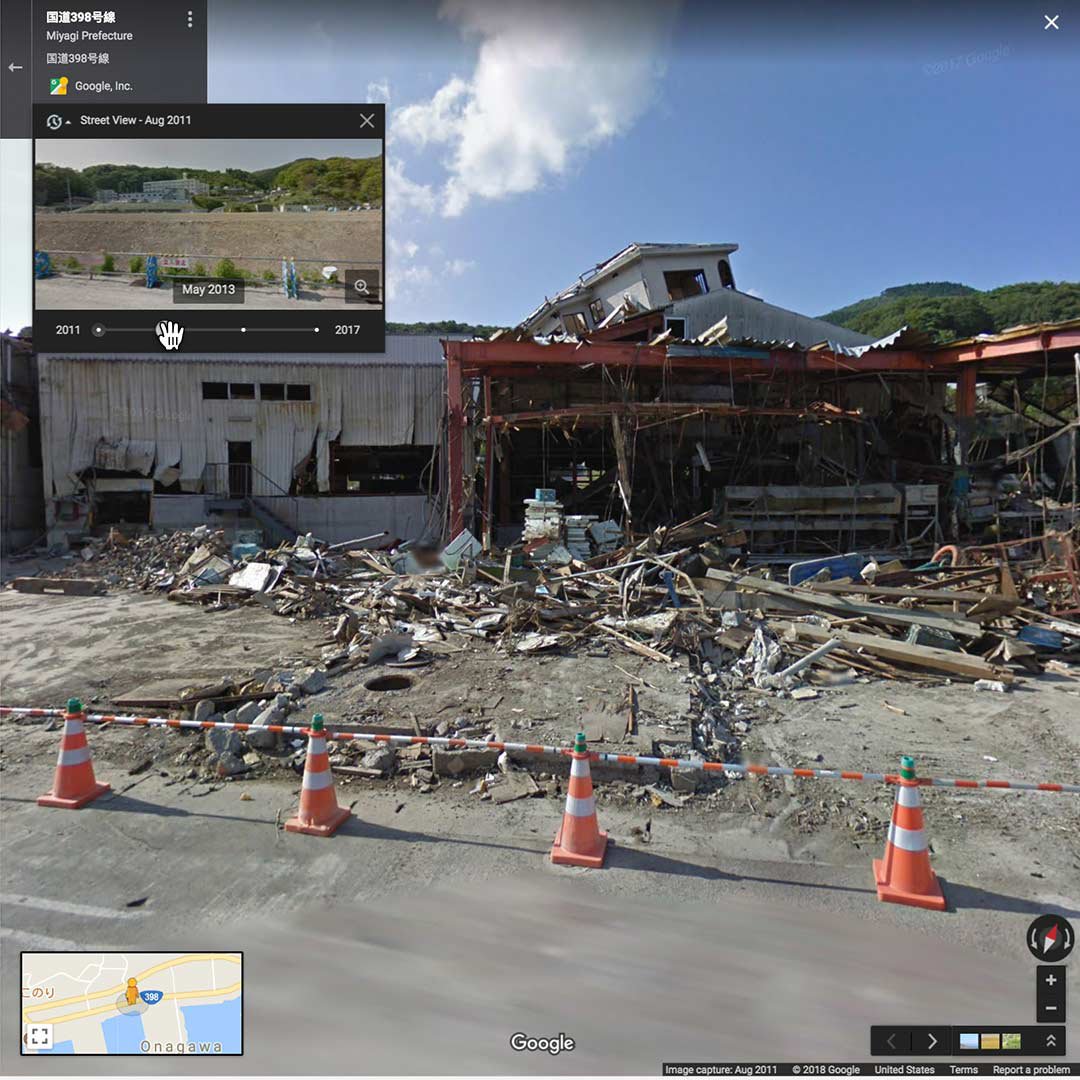
Now look for the clock icon in the upper left of the map, which indicates that historical panoramas are available (since coverage varies, you will not always see the clock). Use the slider to toggle on different panoramas, marked with the month and year each was collected.
To see a larger view of the selected panorama, click the magnifying glass icon.
If you would like to use available imagery for your story, for example, in a photo slideshow, video, or GIF, use your computer’s screen capture feature to save the needed image. Remember to credit the imagery to Google Maps Street View (visit google.com/permissions or see our Permissions tutorial for details).
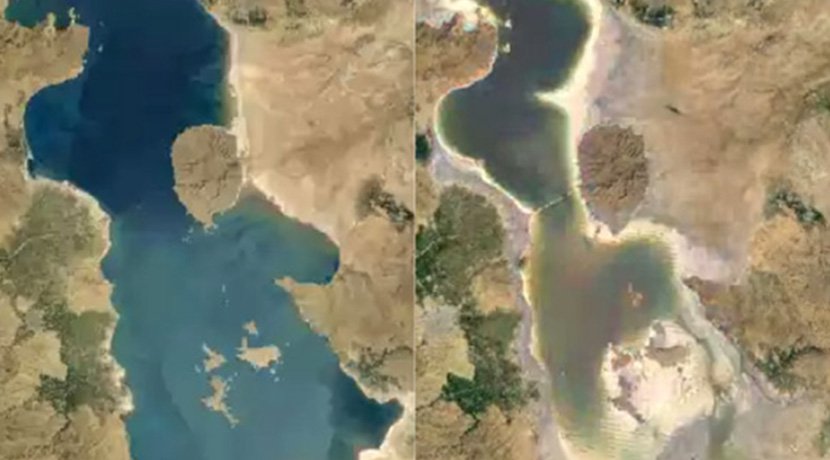
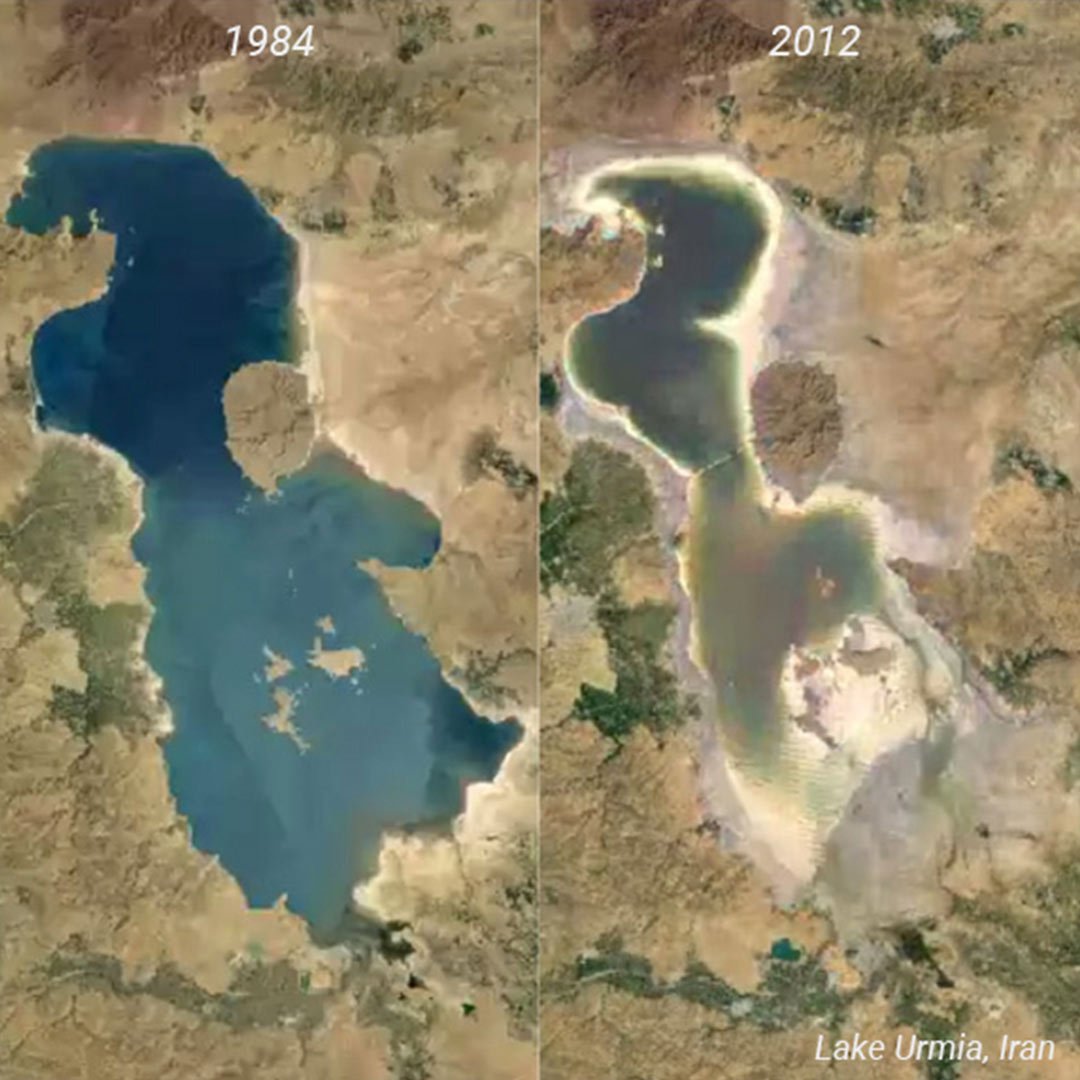
Google Earth Engine: Landsat Timelapse.
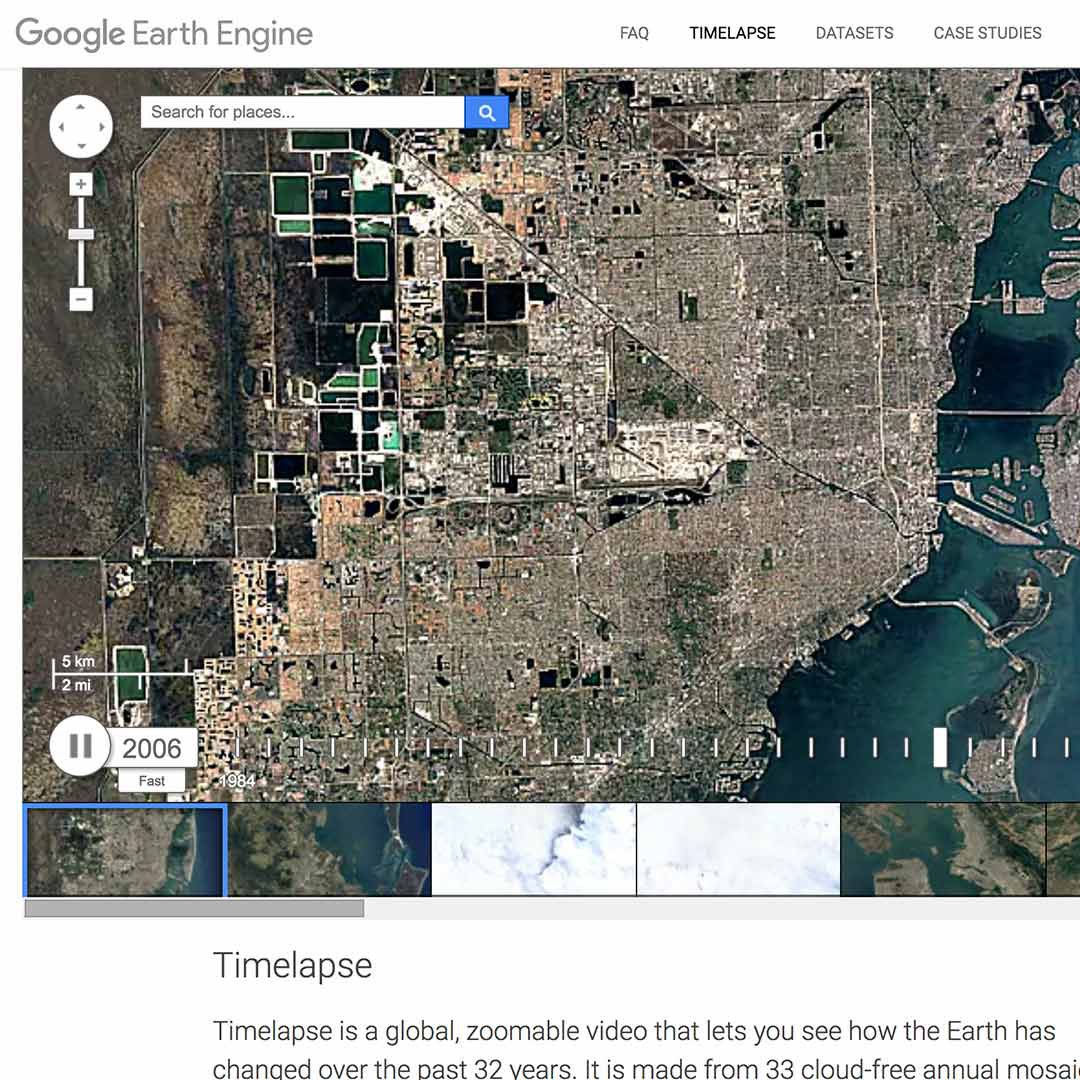
A Timelapse map can be a powerful accompaniment to coverage of local, environmental or science-related issues. Working closely with the USGS and NASA, Google released more than a quarter-century of images of Earth taken from space, compiled into an interactive time-lapse map that allows viewers to watch change across the entire planet’s surface beginning as early as 1984.
A time-lapse map can be a powerful accompaniment to coverage of local, environmental or science-related issues. Working closely with the USGS and NASA, Google released more than a quarter-century of images of Earth taken from space, compiled into an interactive time-lapse map that allows viewers to watch change across the entire planet’s surface beginning as early as 1984.
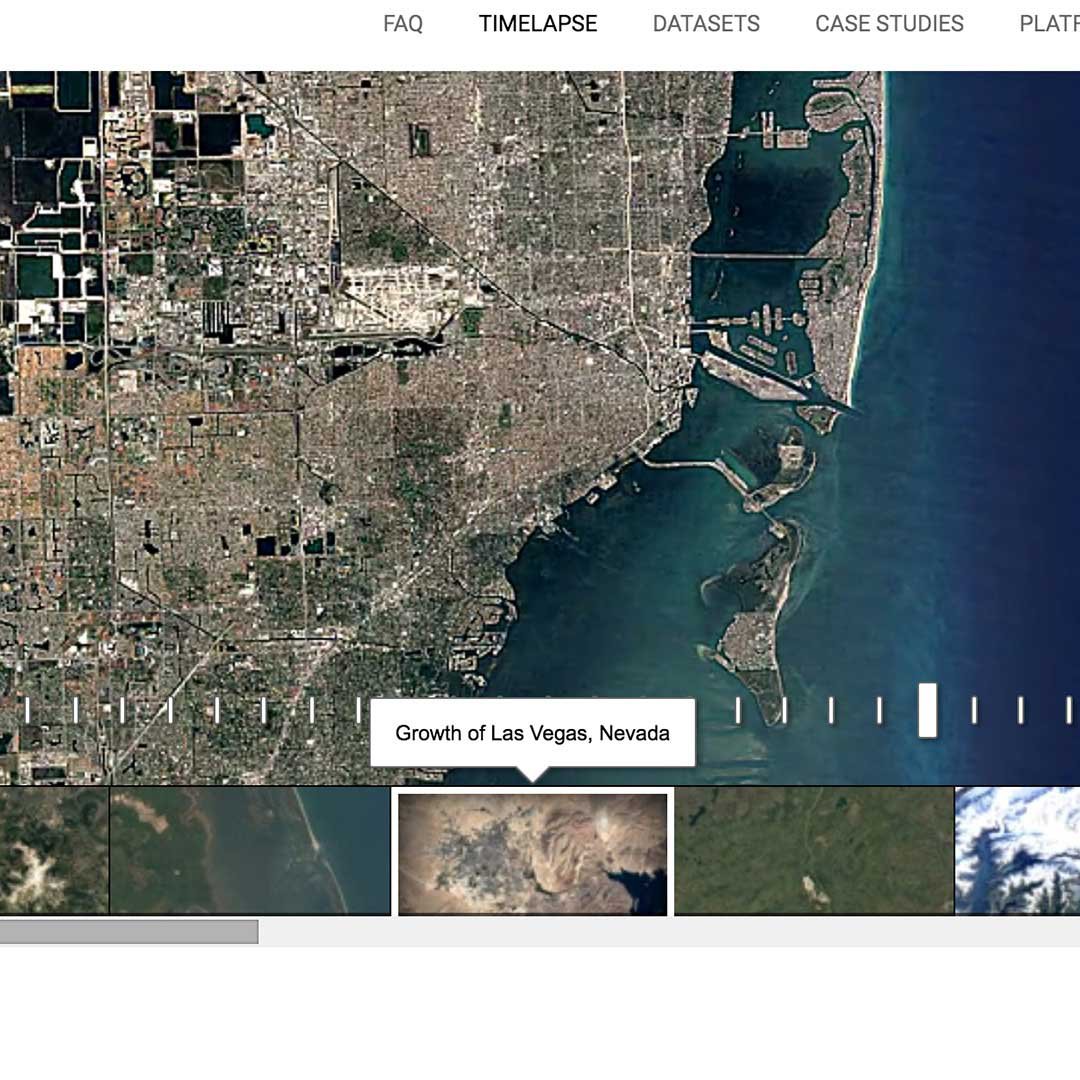
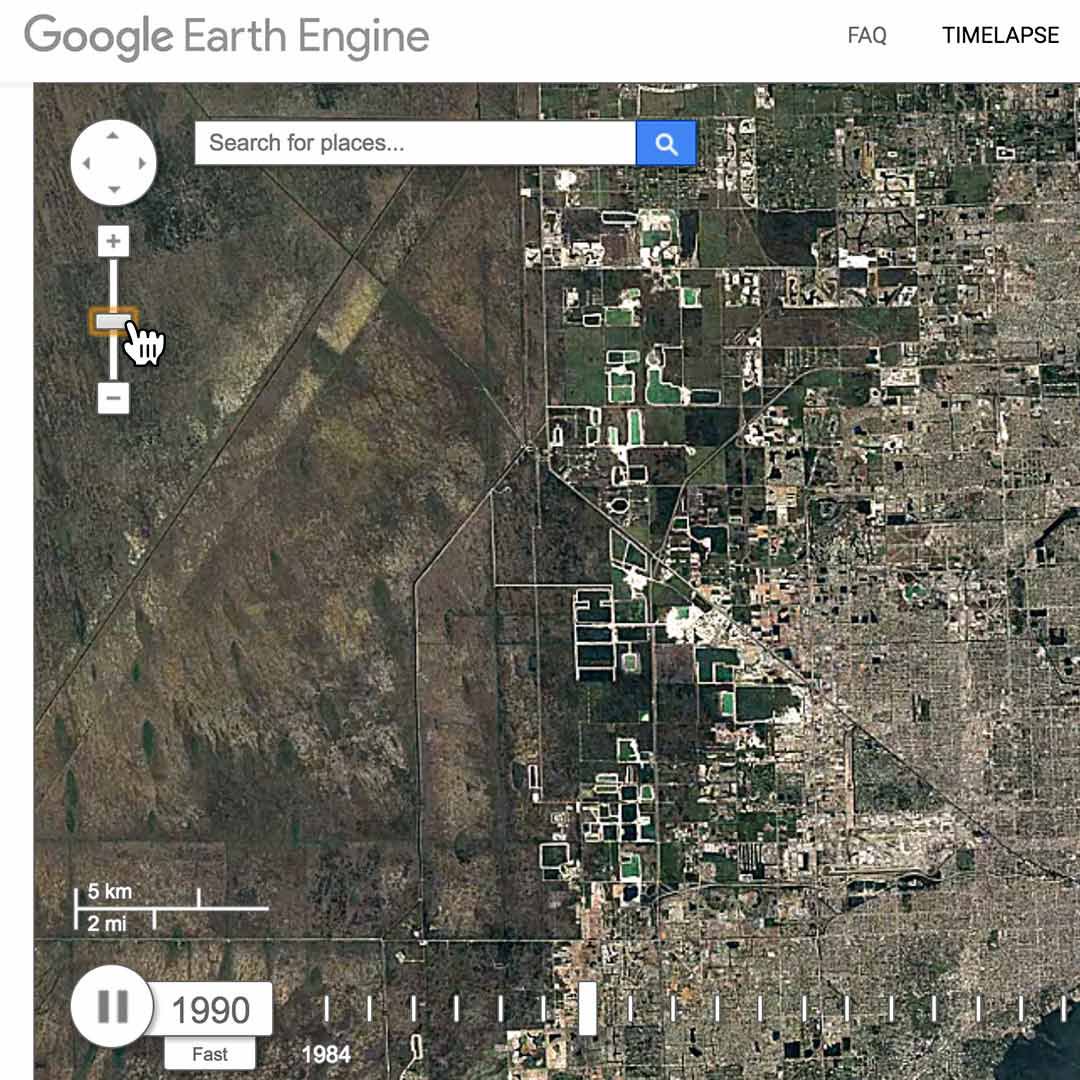
Visit earthengine.google.org and scroll down to the thumbnails of phenomenon such as the sprouting of Dubai’s artificial Palm Islands, the retreat of Alaska’s Columbia Glacier, the deforestation of the Brazilian Amazon and urban growth in Las Vegas.
When viewing these areas, remember that Timelapse is an interactive map, so you can pan and zoom just as you would on Google Maps.
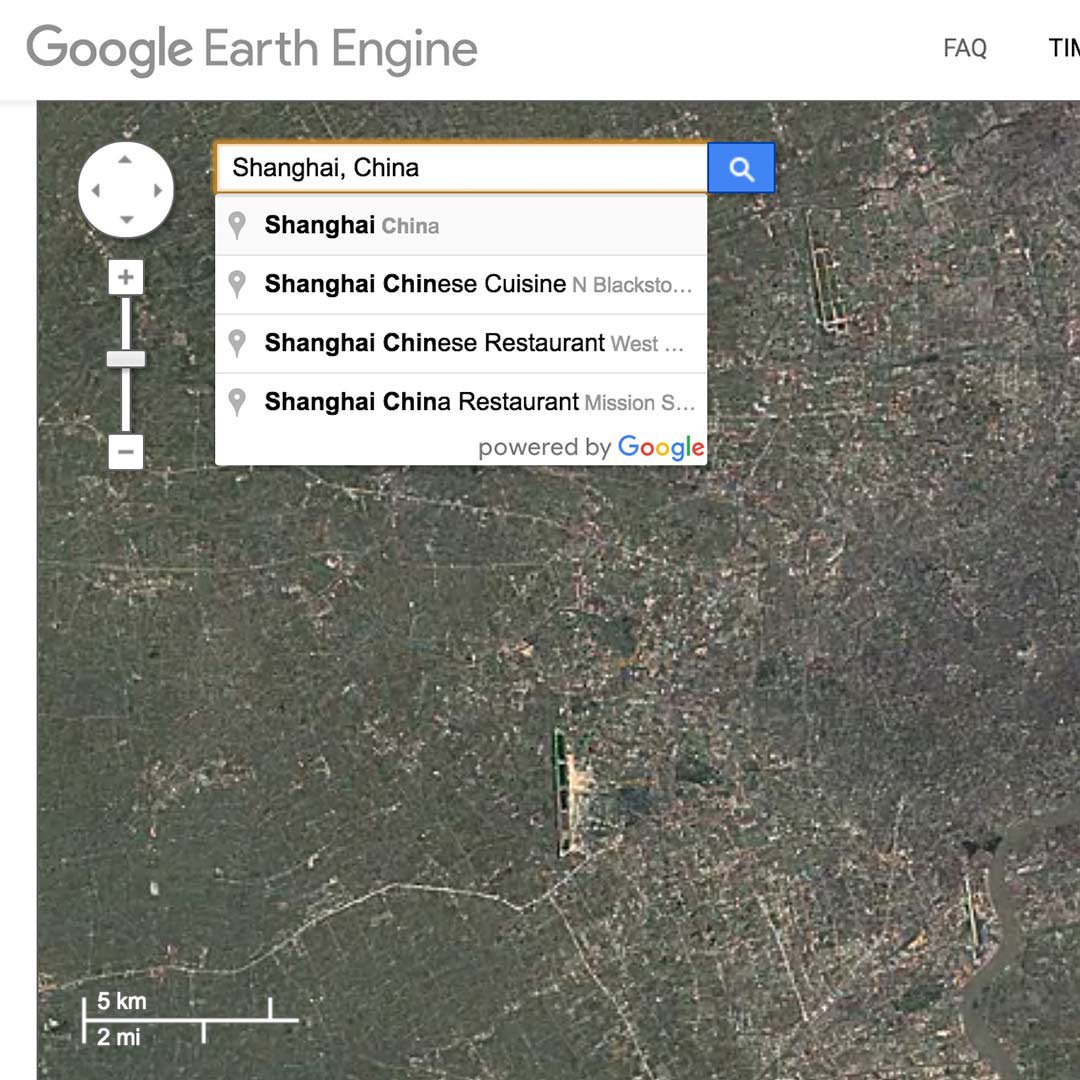
You can also use the map’s search bar to view a location other than those featured on the homepage.
Sharing a timelapse.
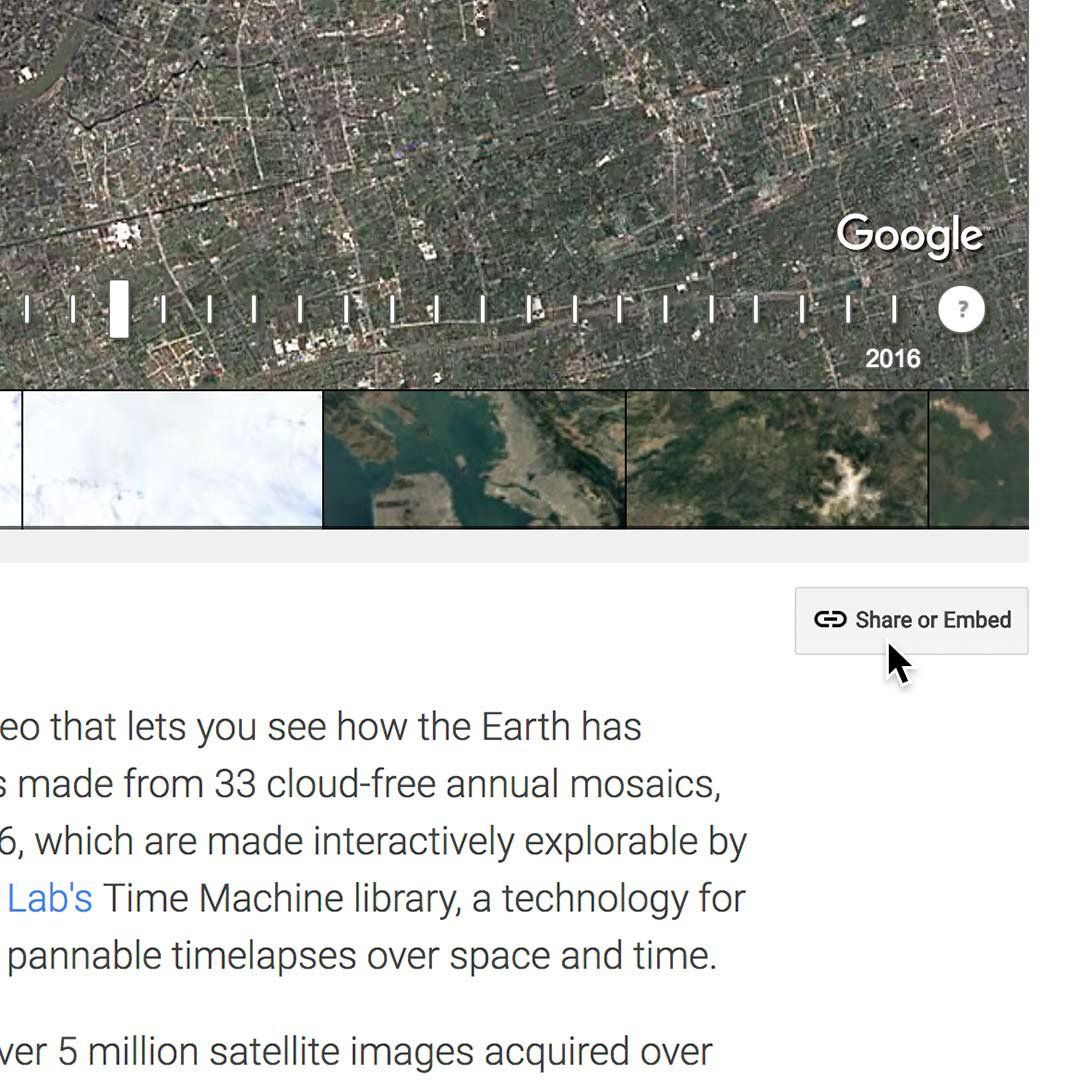
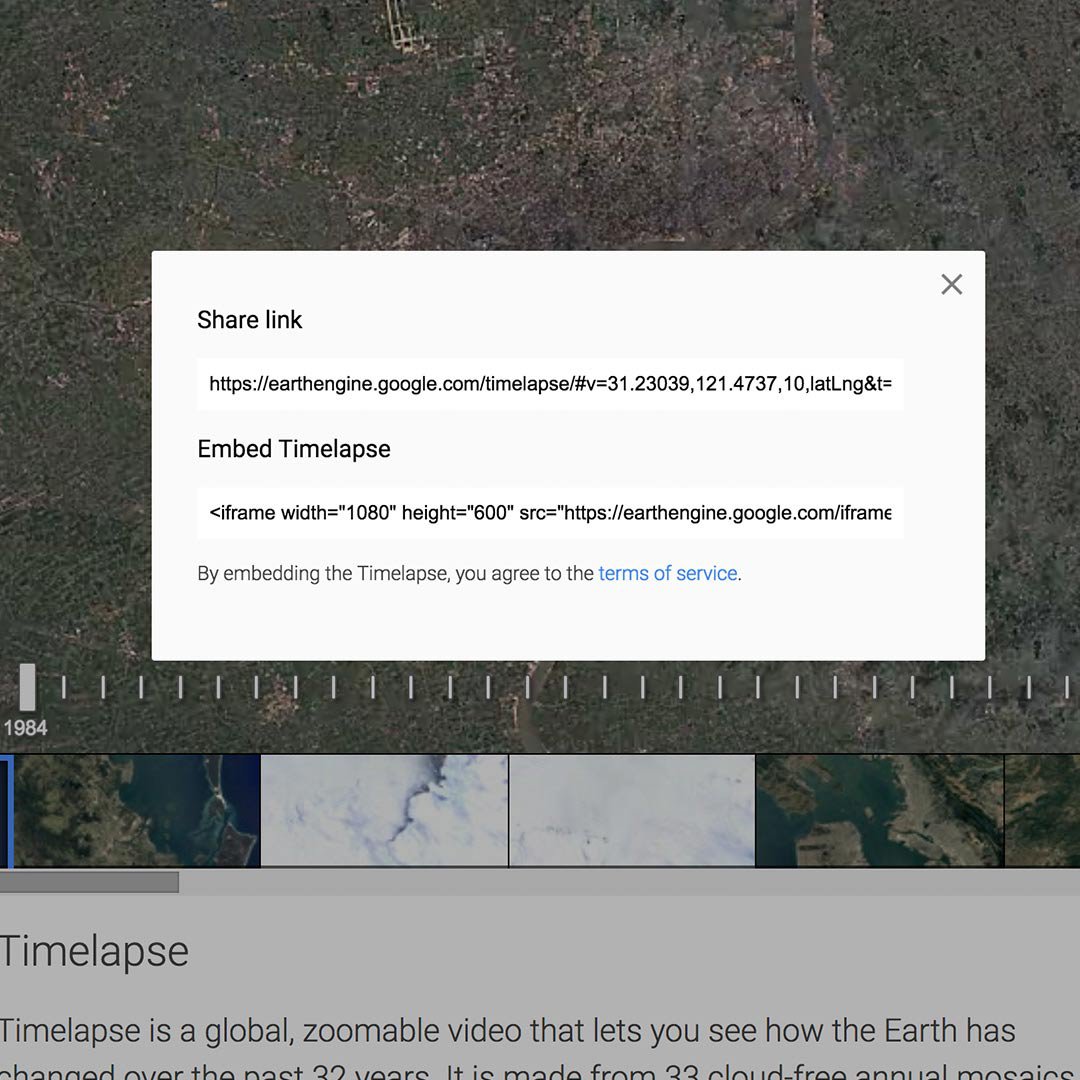
The Share button below the map generates a link you can use to share the map and embed it on your website.
The link and embed will take viewers to the same area of the map you were viewing when the Share button was clicked.
Creating a custom timelapse.
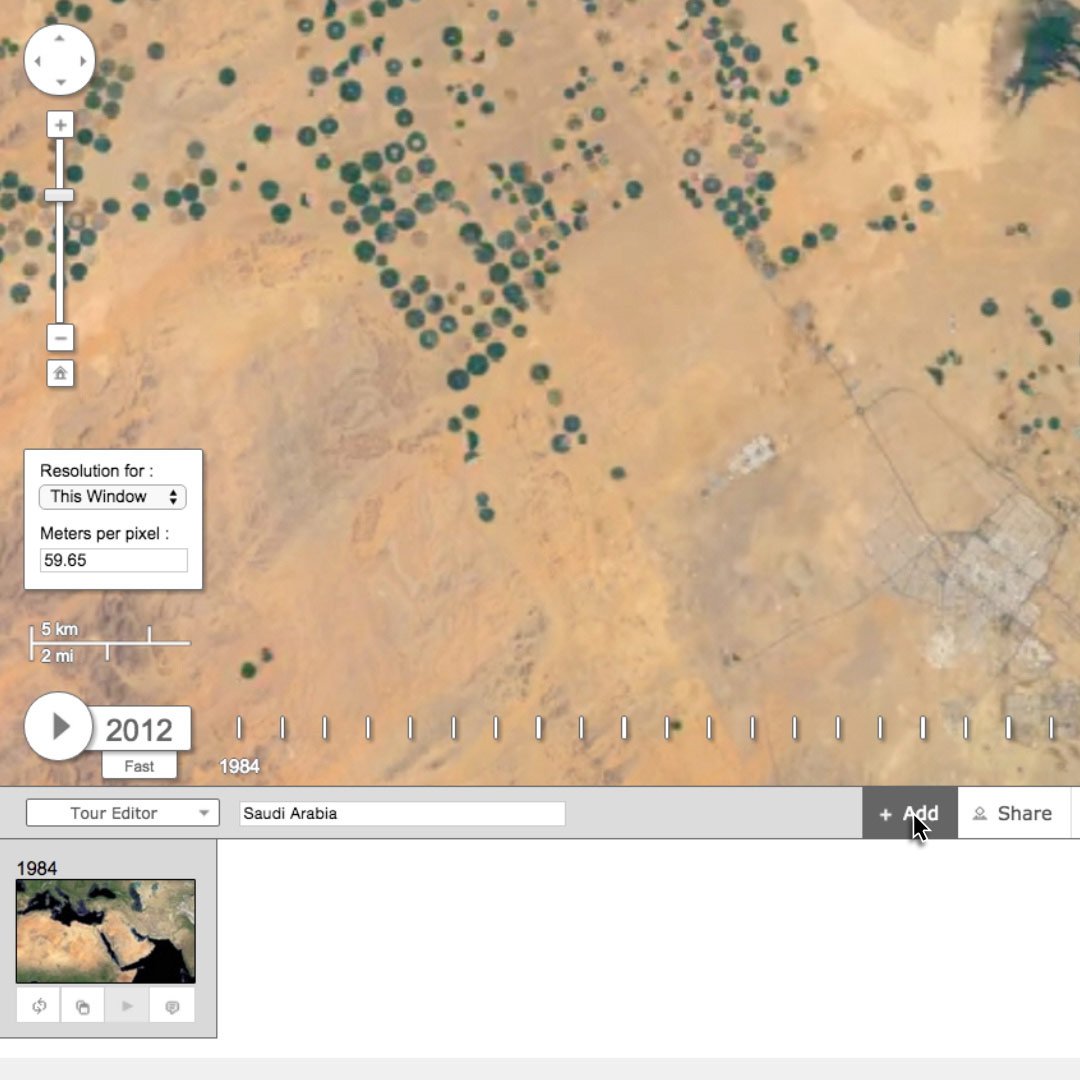
Instead of showing one static area through the years, you can customise your map to travel in various directions over time. Use this time-lapse editor, developed by Carnegie Mellon’s CREATE Lab, which allows you to fly to the locations you want to highlight and add keyframes at each stop. Let’s say you’re doing a story on the effects of irrigation in Saudi Arabia, and you’d like to show the change and expansion of the landscape as more water is introduced.
Start your tour above the irrigation fields, and add a keyframe. Now let’s go in closer and add another keyframe, and move north so the camera reveals additional irrigation fields and add one more keyframe.
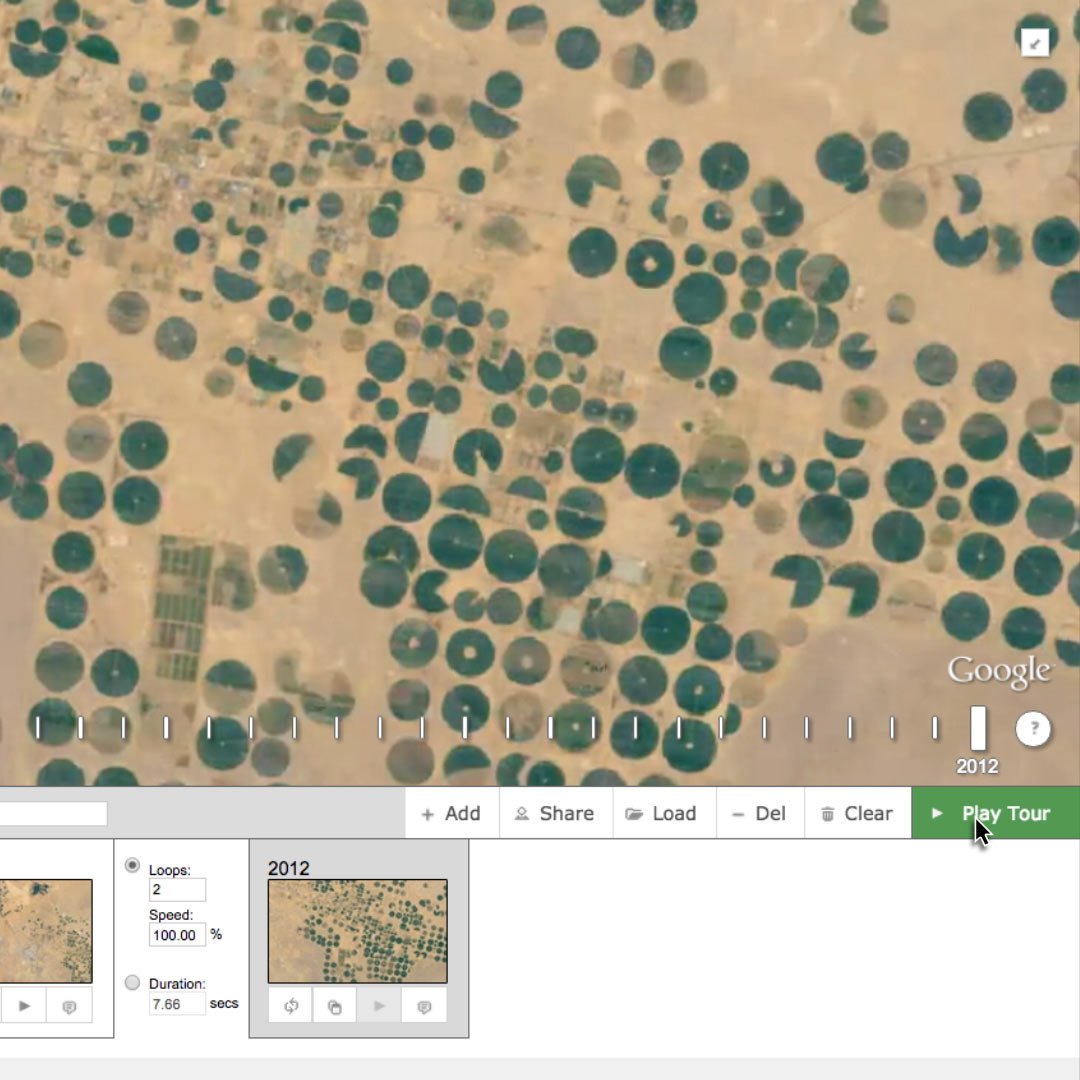
Click Play Tour to see your finished map. You can set loop and duration information for each key frame in the transition panels.
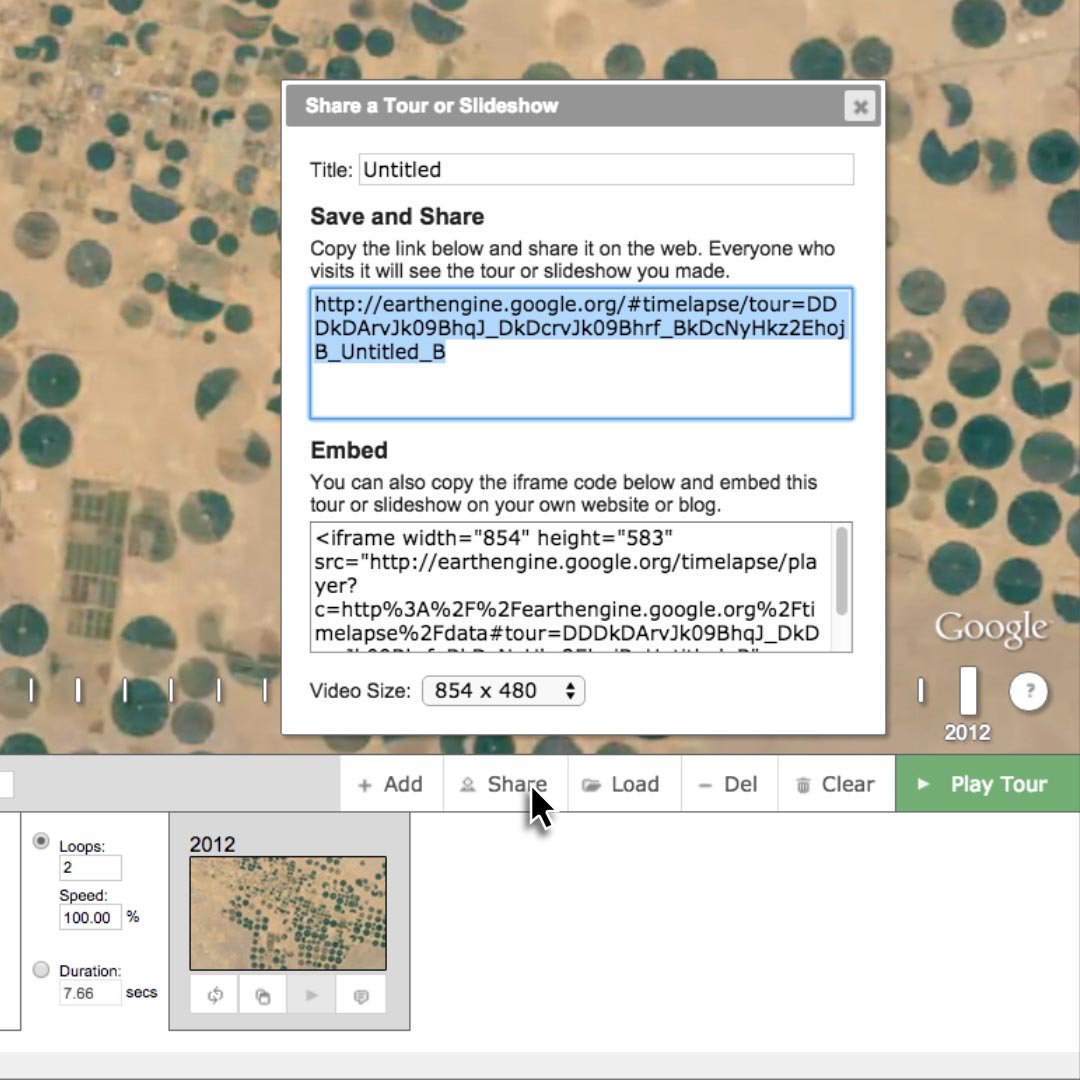
When you’re ready to share or embed this tour on your website, just click the Share button. The link above includes more options for customization.
-
![Verification_ChromePluginsAndExtensions]()
Verification: Chrome Plugins and Extensions
LessonHow to speed up the verification process using Google Chrome. -
![G0801_GNL_YTStorytelling_Title_Card.jpg]()
-
![GO801_GNI_GoogleSearch_TitleCard.jpg]()
Verification: Google Search
LessonMaster advanced search shortcuts to filter results by date, relevance and language.