


Training your Machine Learning model

Import your data in AutoML Vision and start the training process
Prepare your data for import

It's time to go back to our Google Cloud account and continue the exercise by importing our training datasets to AutoML Vision.
The quickest way to add labelled images is to upload separate zipped folders containing examples for each label. In our case, we have two folders/labels: “positive” (images with examples of amber mining) and “negative” (without). You could also upload all the images together and label them manually inside the AutoML Vision interface but it would take much longer.
Import the data into AutoML (1)
Download on your local disk the two zipped folders:
While they are being downloaded, re-open the Google Cloud platform via this link. Once the two folders have been downloaded to your local disk, follow these steps to upload them to AutoML Vision:
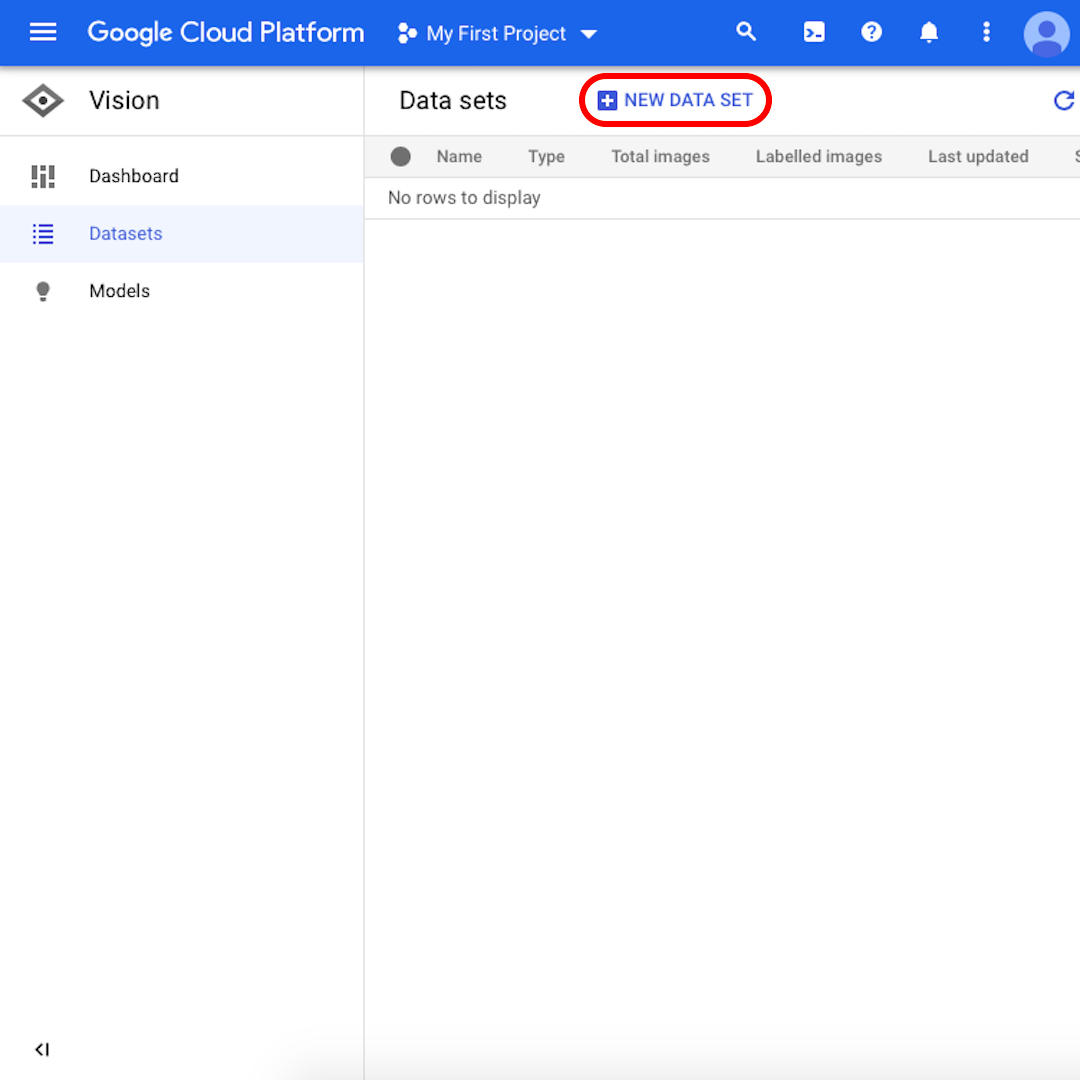
From the interface, click on “New Dataset”.
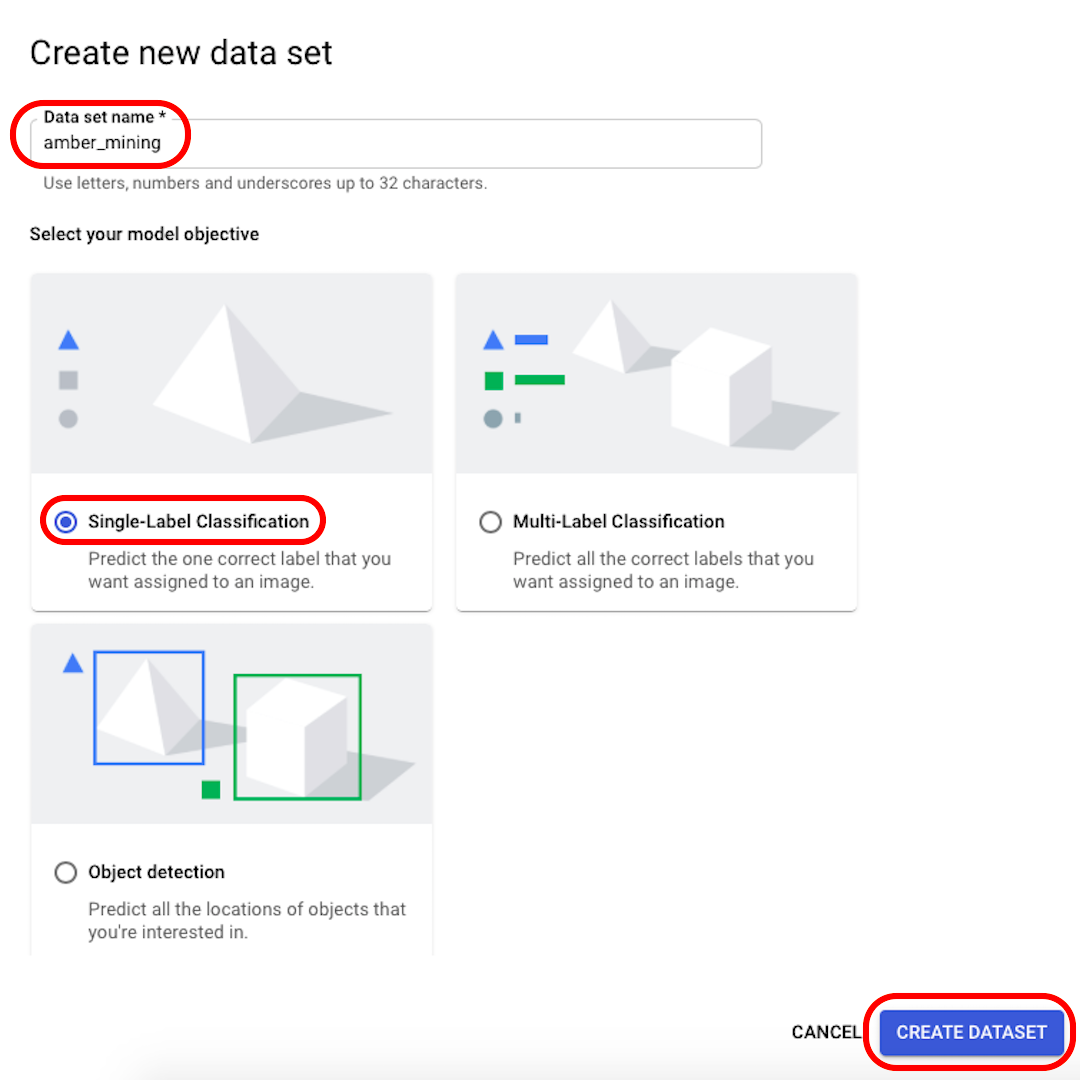
Rename your dataset to something recognisable (for example, “amber_mining”), select “Single-Label Classification” as your model objective, and click on “Create dataset”.
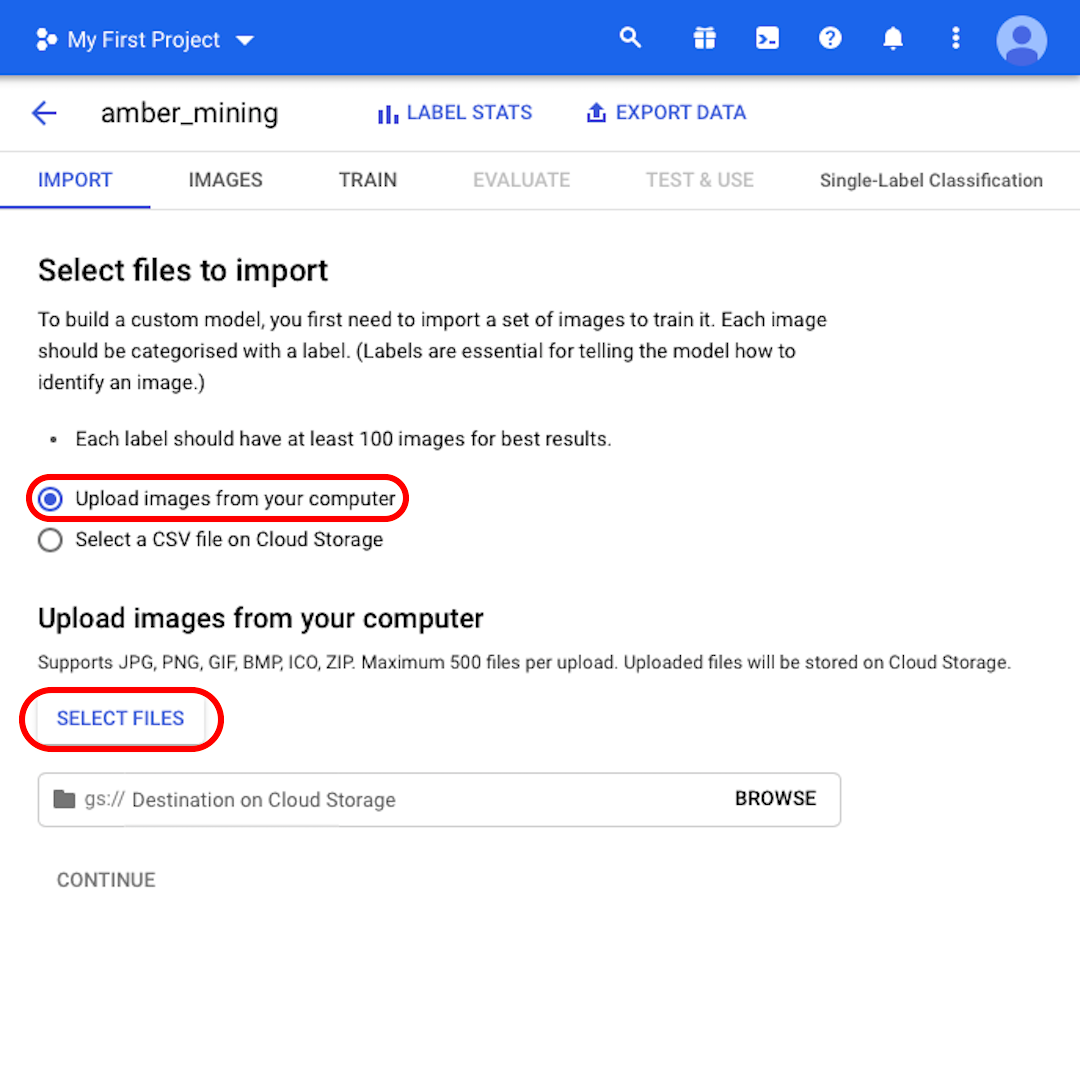
Keep selected “Upload images from your computer” and click on “Select Files”. From the menu that will open, select both “positive.zip” and “negative.zip”. Confirm your selection.
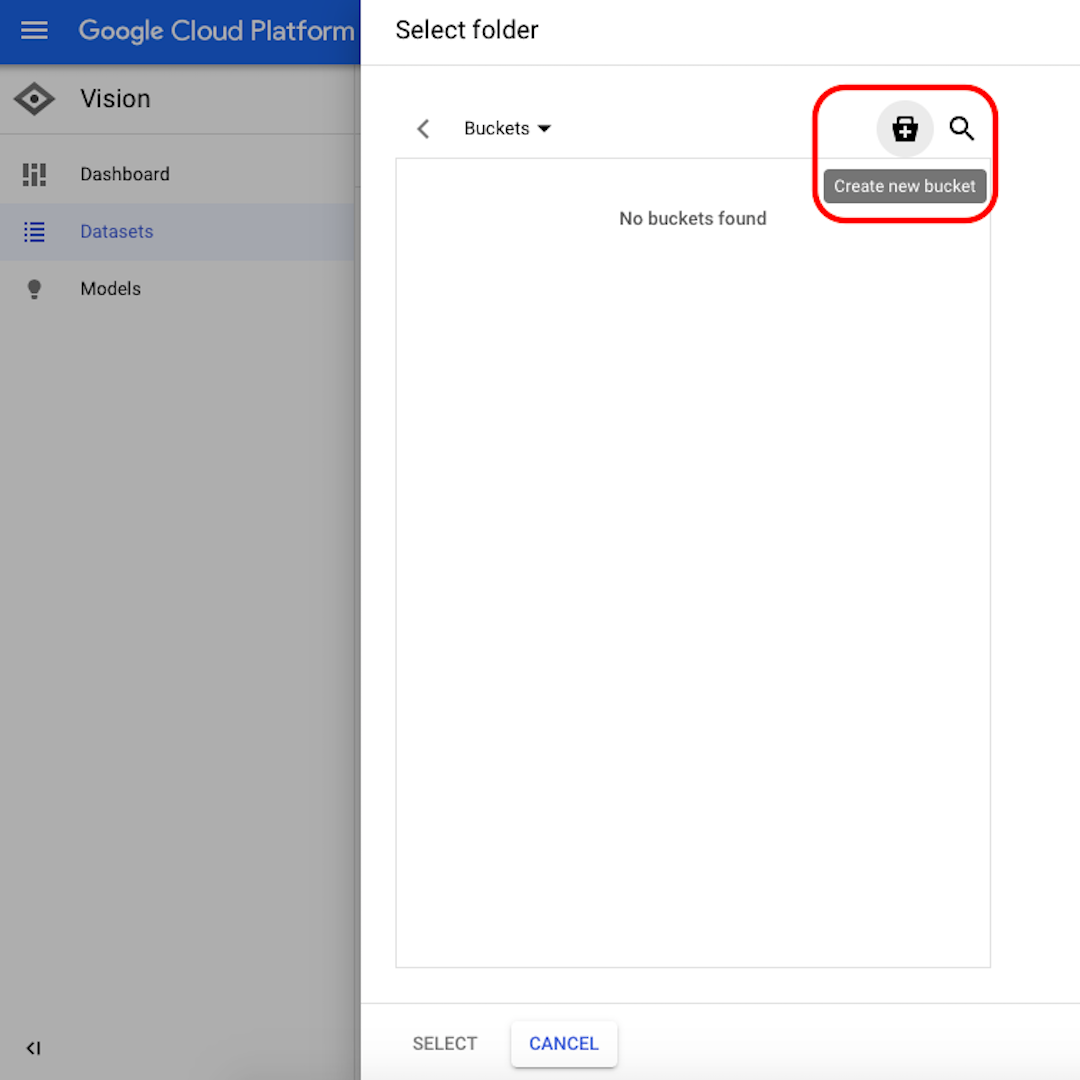
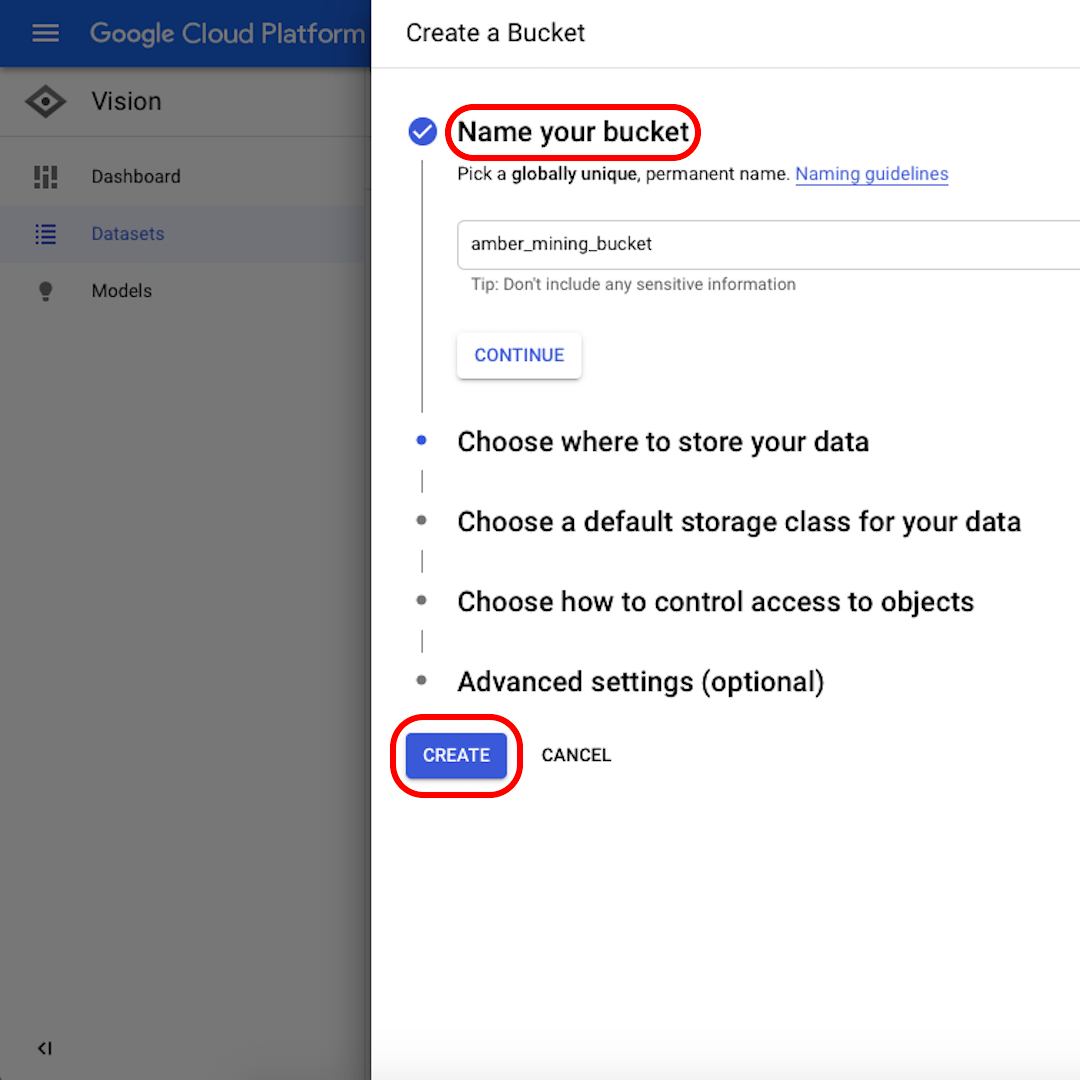
Click on “Browse” to select a destination on Cloud Storage and in the window that will open, click on the icon in the top-right corner to “Create new bucket”.
Give a name to your bucket. For the purpose of this exercise, it doesn’t matter what you select in the following options. Click on “Create” and then on “Select” in the next window.
Import the data into AutoML (2)
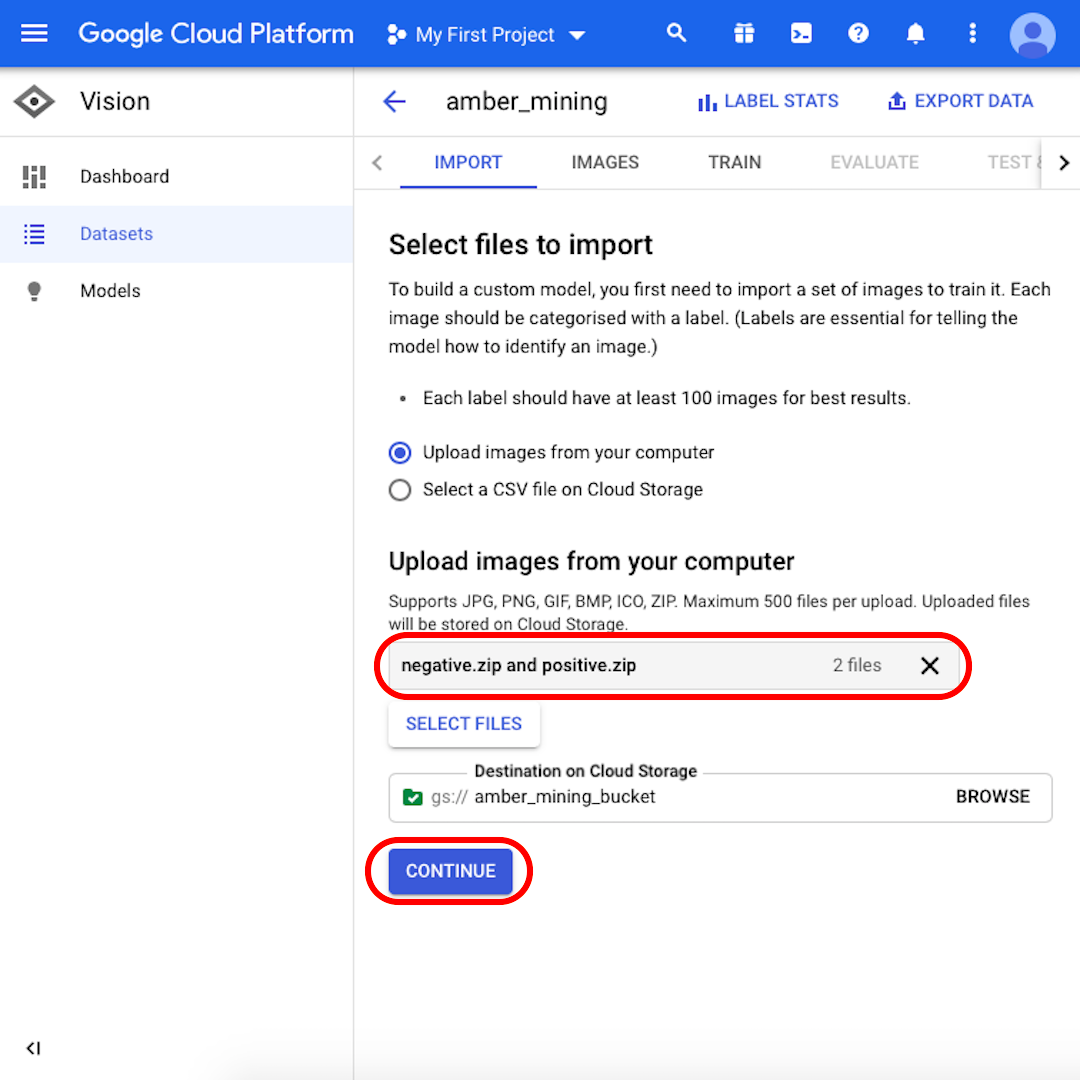
We are now ready to upload the training sets:
Make sure that both “negative.zip” and “positive.zip” appear in the grey box and click on “Continue”. Wait a few seconds or a few minutes – depending on the speed of your connection – for the images to be uploaded.
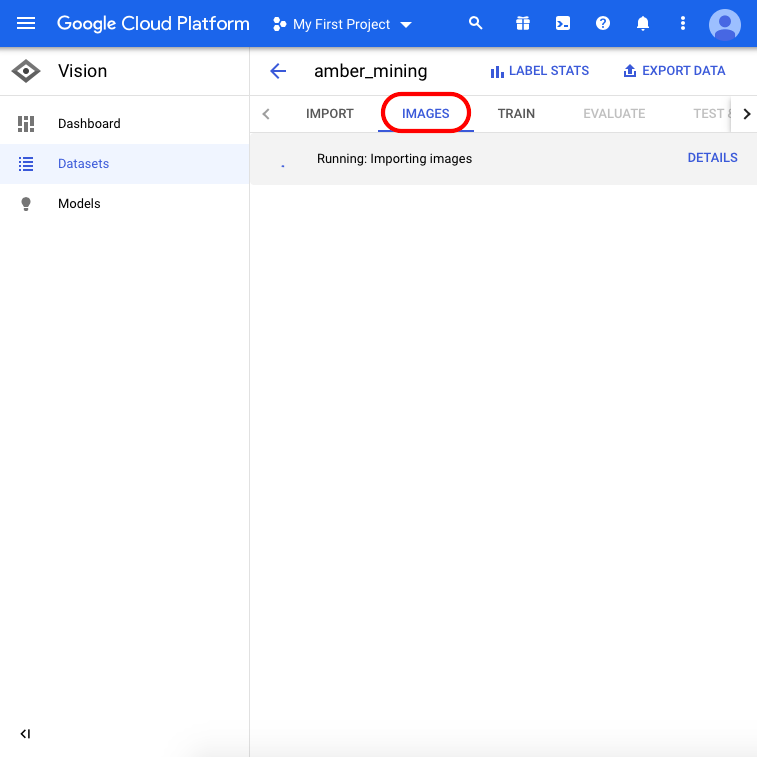
When the upload is complete, click on “Images” from the menu on top of the page and wait for the import process to finish – it might take up to 30 minutes.
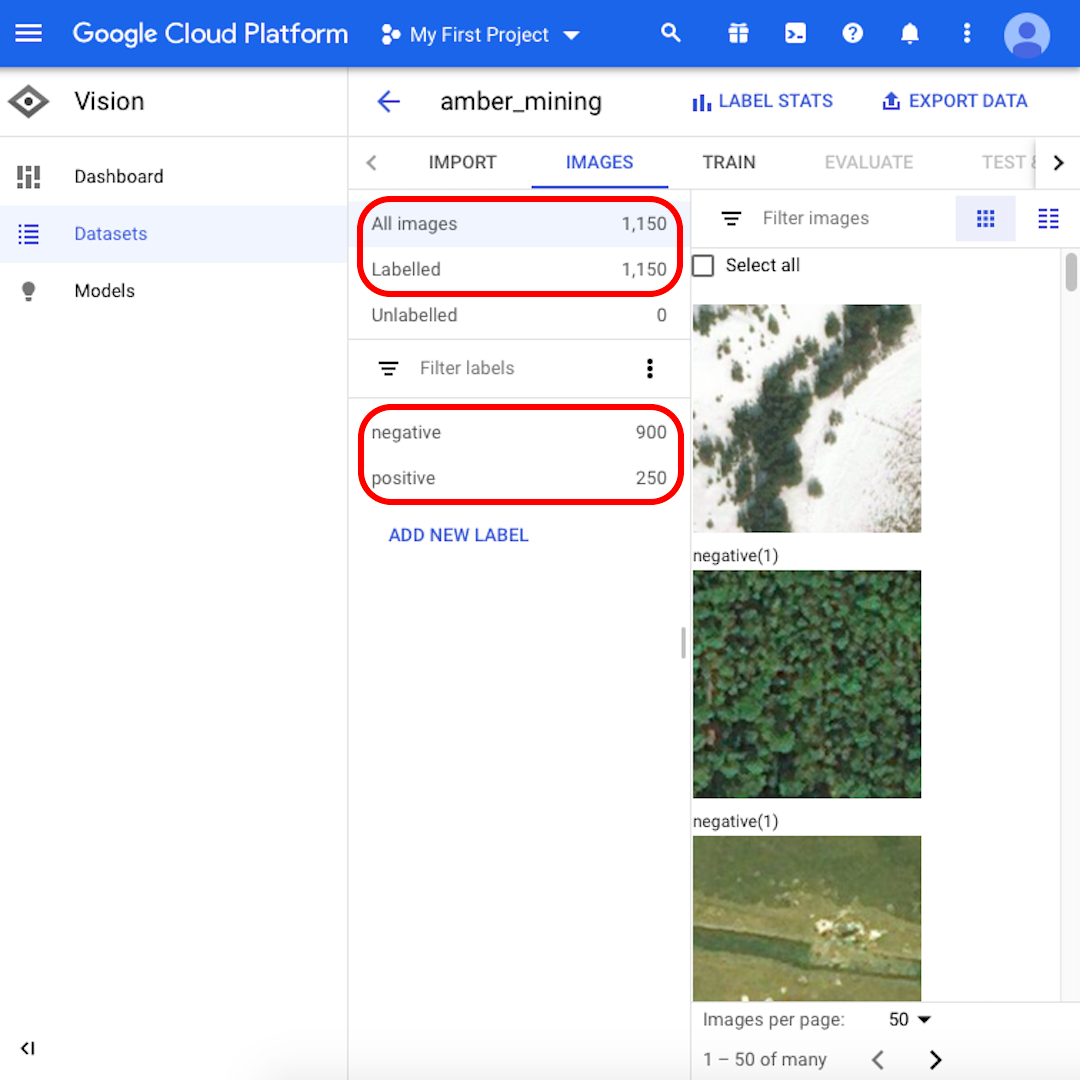
When the import process is done, you will be notified via email. Your Google Cloud Platform will show 1,150 images imported, 900 negative and 250 positive.
Training your Machine Learning model
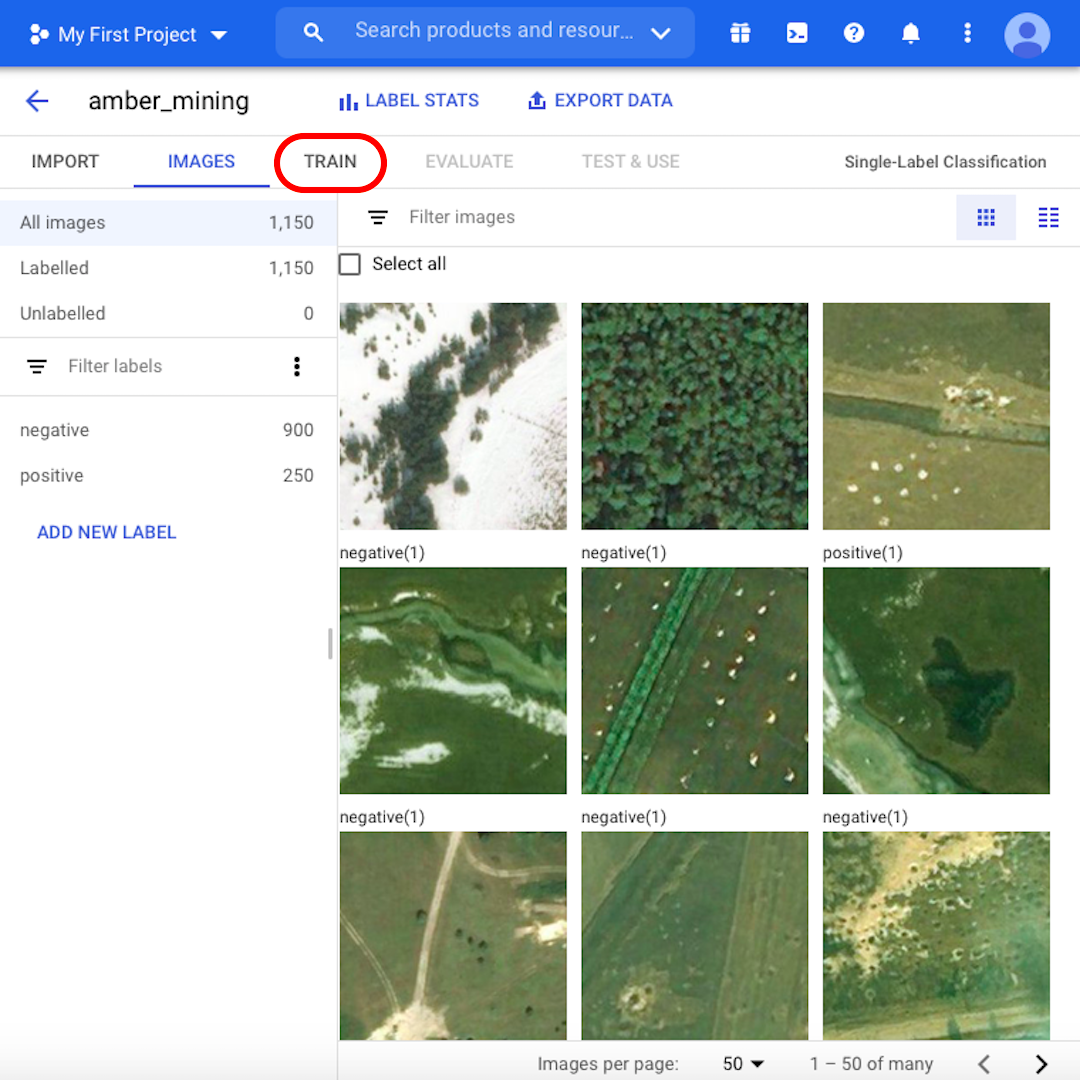
We are now ready to start the training process. But first, browse through the images and learn more about our dataset. Check for example some of the "positive" images. Can you see the distinctive holes, trace of amber mining? If you can recognise it, then your model could do it, too.
For some images, it might not be so easy even for yourself to tell if there are traces of amber mining or not. In the next lesson, we'll see how the model performs on those borderline examples. When you are ready to proceed, click on "Train"
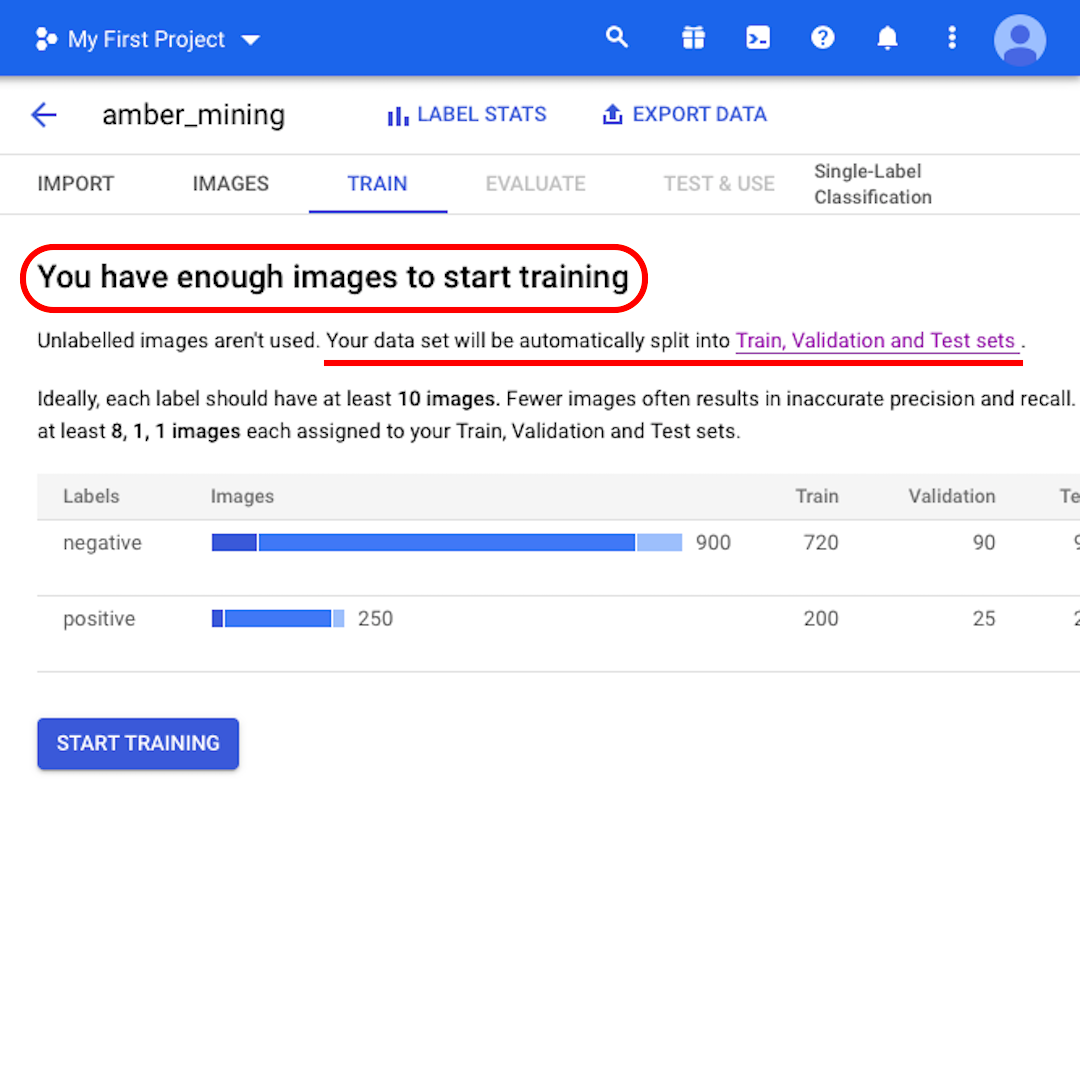
At this point, the model tells you that "You have enough images to start training". It also informs you that "Your data set will be automatically split into Train, Validation and Test sets." Let's see what that means.
Train, Validation, and Test sets
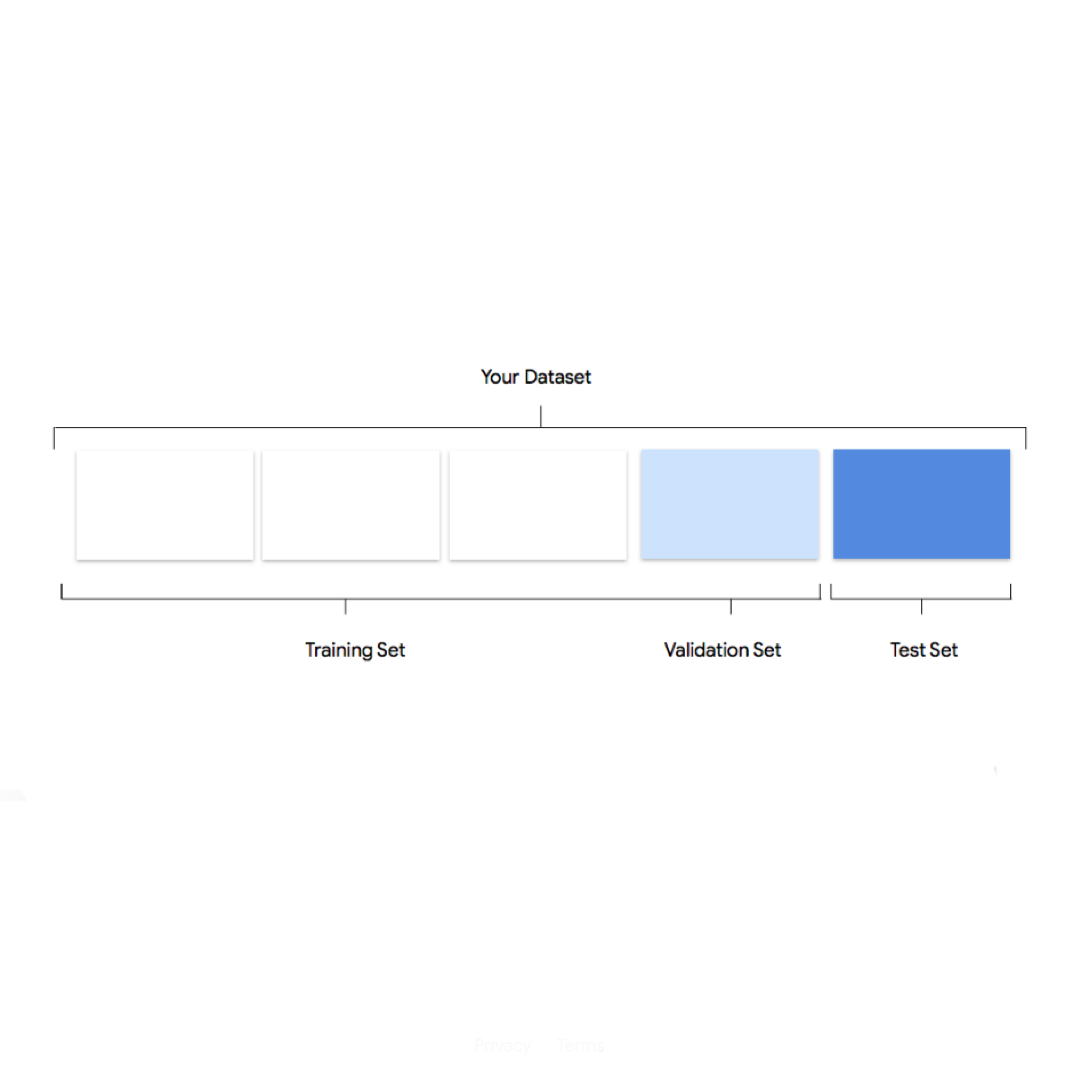
The reason to split our dataset into three separate sets is that we keep some images to the side, so that, after the model is trained, we can evaluate its performance using data it wasn't trained on – but that we know the right label for.
If you do not specify how many images to keep in each set, then AutoML Vision uses 80% for training, 10% for validating, and 10% for testing:
- The training set is what your model "sees" and initially learns from.
- The validation set is also part of the training process but it's kept separate to tune the model's hyperparameters, variables that specify the model's structure.
- The test set enters the stage only after the training process. We use it to test the performance of our model on data it has not yet seen.
-
![GO801_GNI_ProjectShield_Title_Card.jpg]()
Project Shield: Defend against digital censorship.
LessonA free tool to protect your site from Distributed Denial of Service (DDoS) attacks. -
![gni_business_lesson_play_20]()
Build your audience with Google Analytics 4
LessonUnderstand how Google Analytics 4 works to help with audience analytics -
![YouTube Thumbnails (25)]()