
Google Earth: Pinpoint eyewitness locations.
Find out where a photo was taken and when it was uploaded.
Get to know Google Earth.
To successfully verify a photograph or video you need to confirm where it was captured, when it was captured and who captured it.
An interactive virtual globe, Google Earth can quickly help you complete the first step of establishing location.
Newsworthy images that emerge in social media often contain visual clues such as buildings or landmarks, that will help you establish the location. However, images captured in remote or rural areas present more of a challenge.
To begin your verification process, download the latest version of Google Earth:
Prepare for takeoff.
After you’ve installed Google Earth, the first thing you’ll want to do is “fly” to the region where you think the media in question came from. Type the name of the country, town, city or even landmark into Google Earth and it will will swoop the satellite view to that location. The more specific you can be, the better.
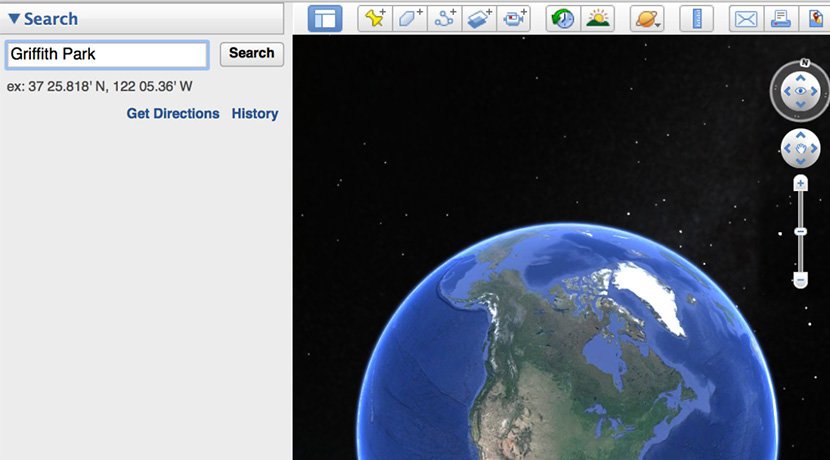
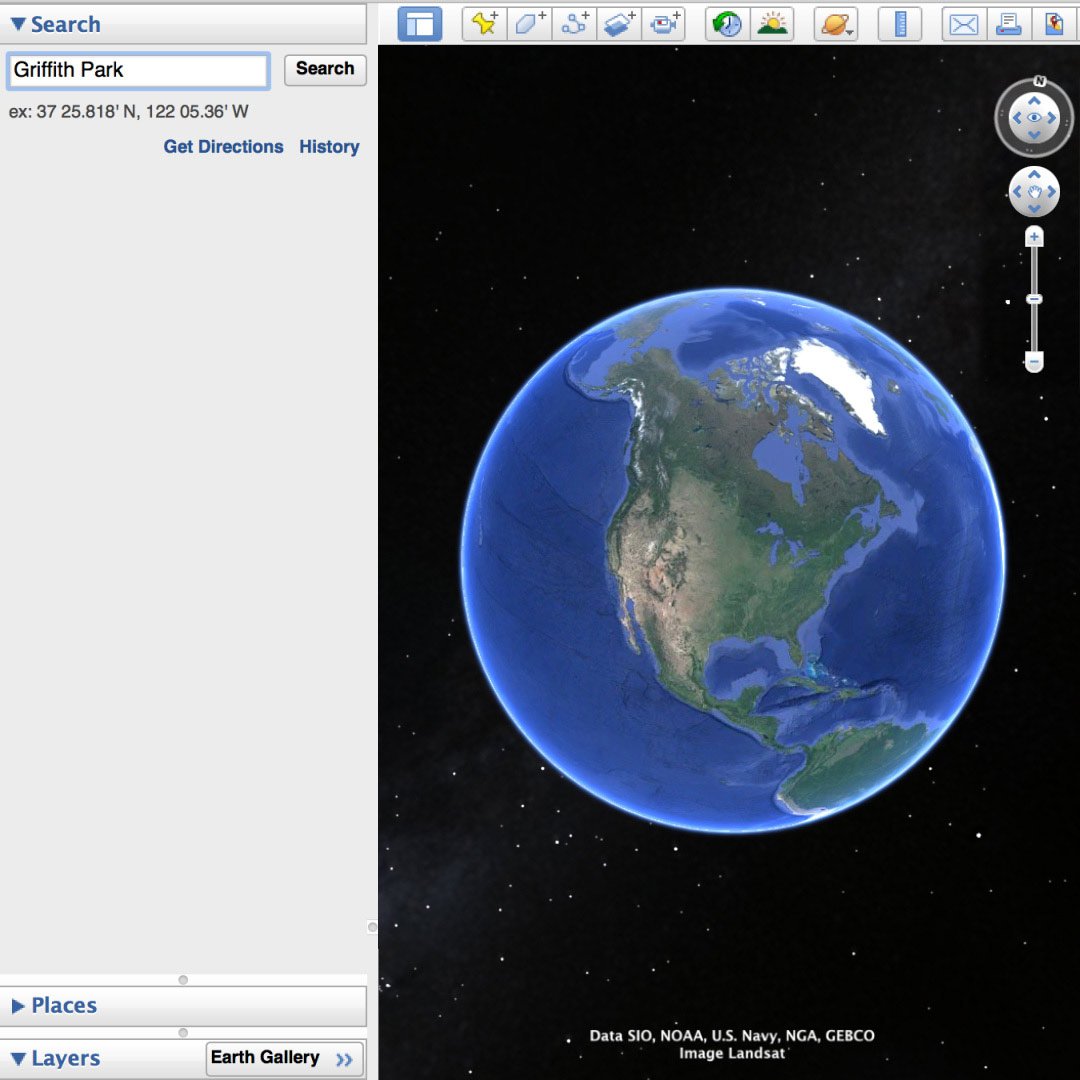
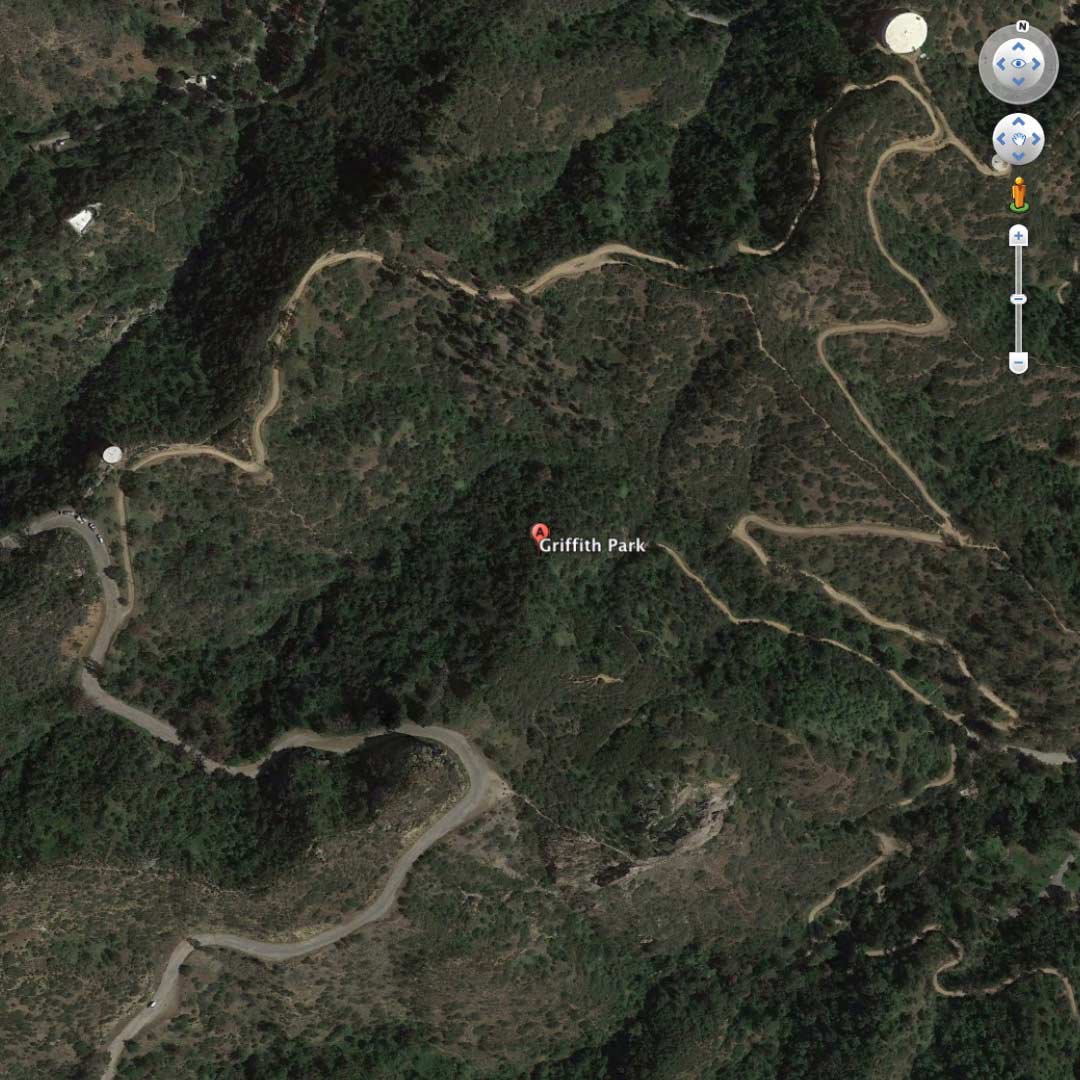
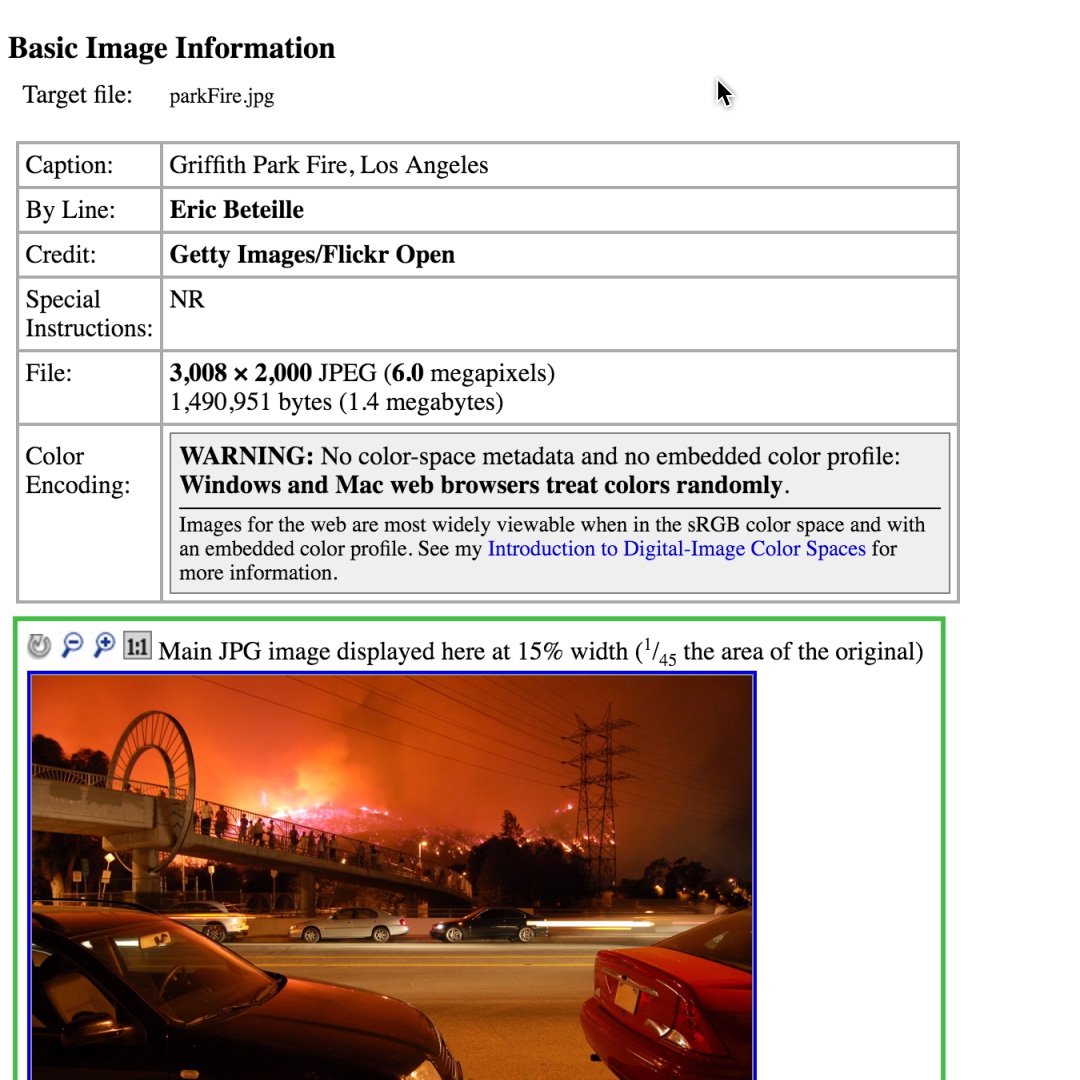
Let’s say you’re working on a story about Southern California wildfires and found a photo on Twitter that purports to be taken in Los Angeles near Griffith Park.
Type Griffith Park into your Google Earth search box to begin.
Google Earth will zoom you in to start looking for clues.
Look for visual clues.
Now that you’ve got Google Earth up and running, it’s time to return to your video or photo and study it carefully for visual clues that will help you narrow down the location.
Landmarks, signage, distinctive buildings, roads, abrupt changes in elevation, water features, wide open spaces, green spaces...make a list of all the elements you see in your region. It can also be helpful to print stills or take screen shots to compare to Google Earth imagery.
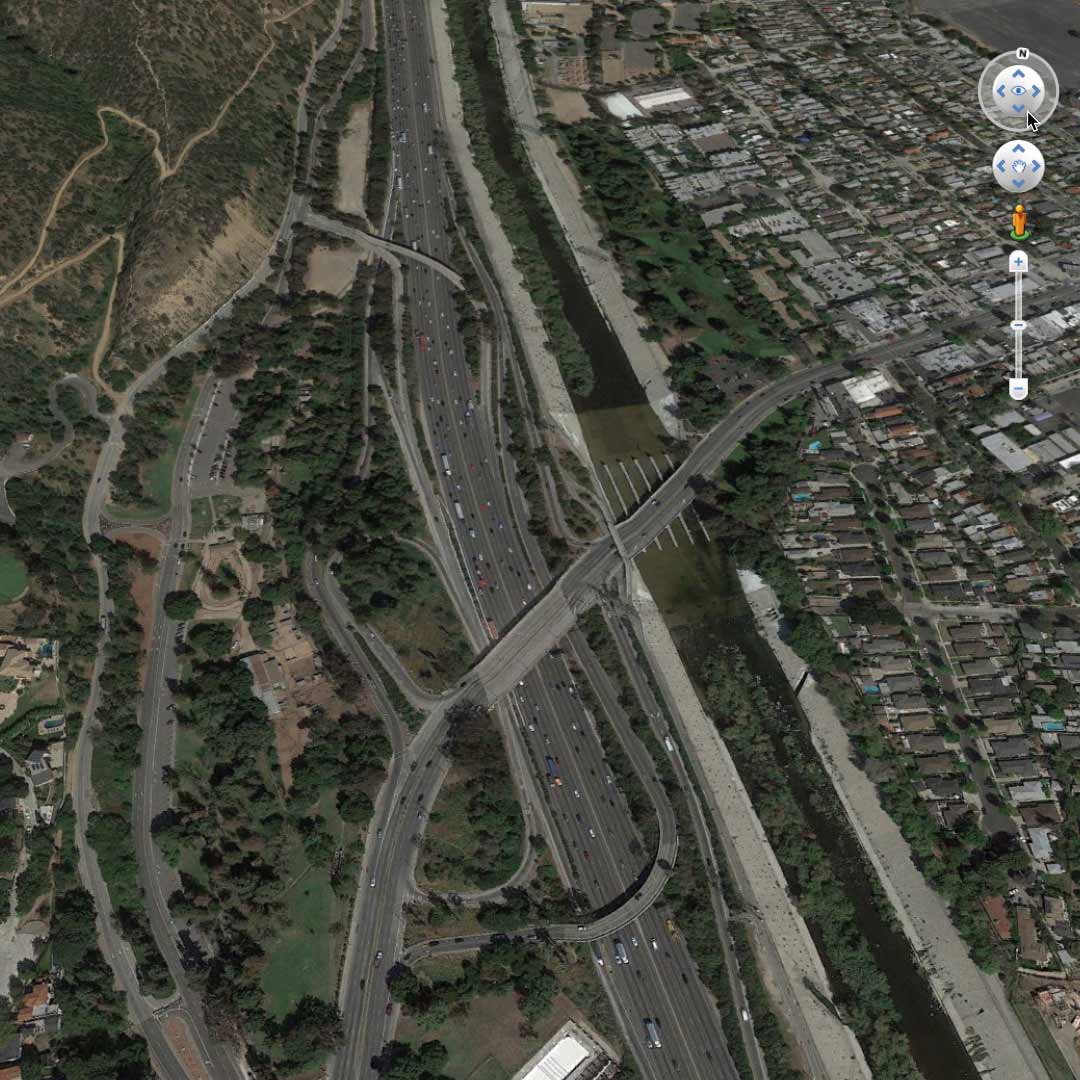
In this case, we’re looking for areas of Griffith Park that parallel the Los Angeles River. We’re also looking for a pedestrian bridge that crosses a major street.
Use the slider to zoom in until features on the landscape are visible, then click and drag to explore the surrounding area.
Use layers to modify your view.
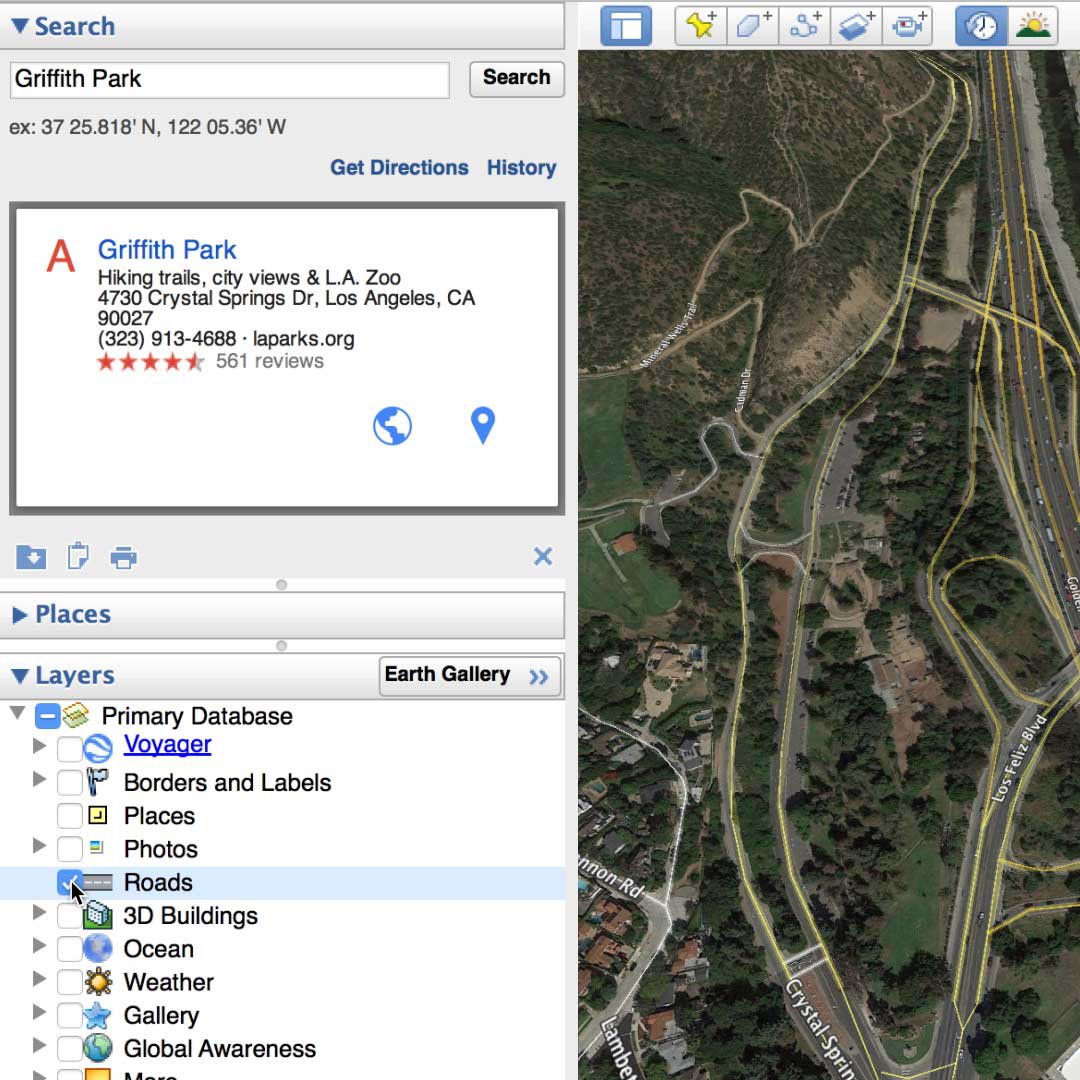
The Layers panel in Google Earth allows you to choose what kind of information you'd like display in your 3D viewer. Emphasizing different features may further your quest to pinpoint a location.
Selecting and deselecting a checkbox next to particular layer turns it on or off. For example, turning on the Roads layer will display main highways with yellow lines and minor roads with white lines, along with street names. Turn it off, and this information becomes invisible.
Pinpoint your location.
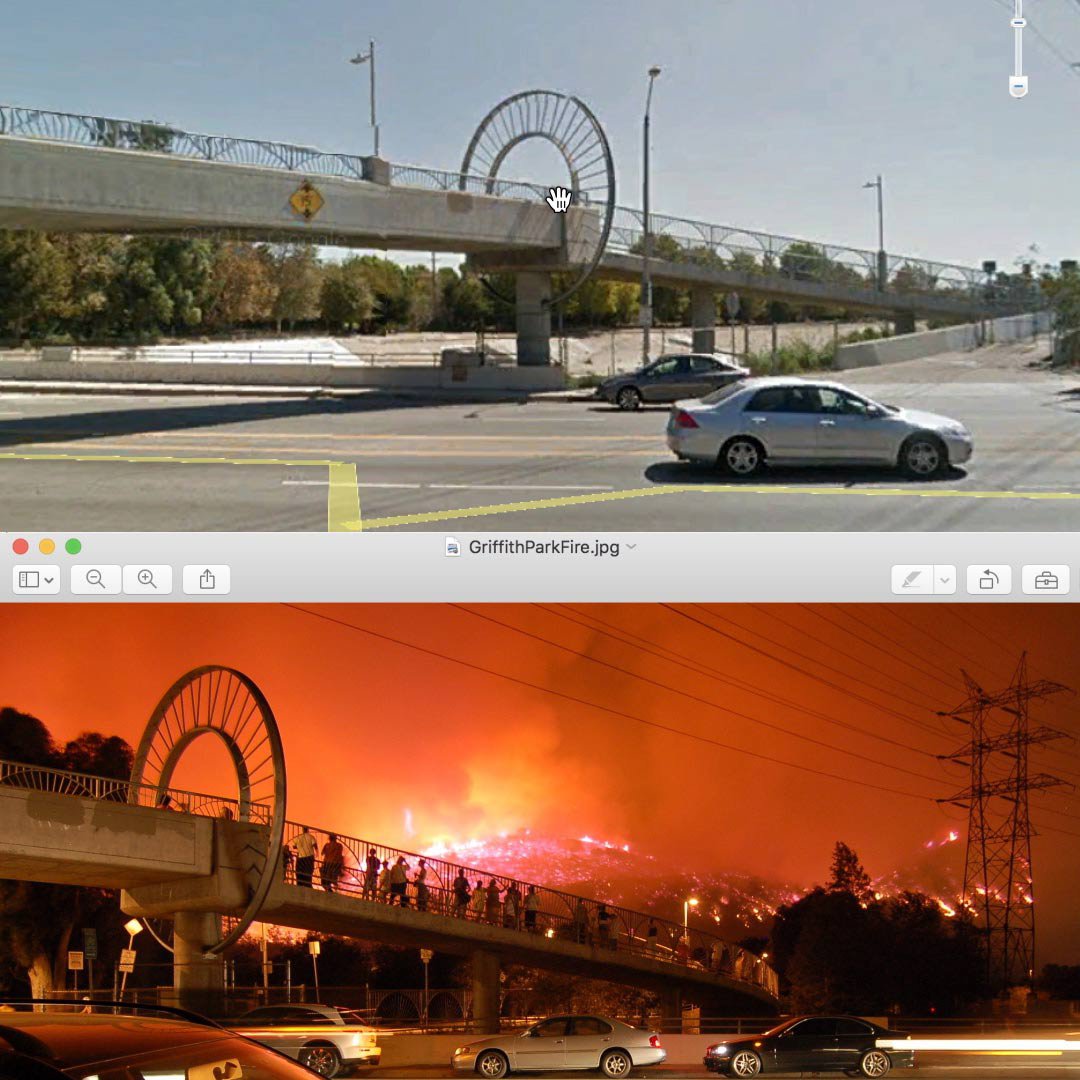
Once you’re in the correct vicinity, you can zoom in to try and match up the Google Earth view with your news image.
Double click on any point to zoom in for a close look. Use the top right navigation arrows to tilt the view and change your perspective.
If you zoom in too close, click Exit Ground level View in the top right corner of the screen to pull back to a wider shot.
Once you’ve found a precise location match you can move on to additional methods of verifying such as date or author, if they are relevant.
Examine image data.
All digital images contain EXIF data; information gathered by the device at the point of capture, such as time, date, latitude and longitude coordinates. Entering these coordinates into Google Earth will take you straight to where the photograph was taken.
However, most social networks and messaging apps strip out EXIF data, so always ask a source source to email you the original image so that you can extract the EXIF data yourself. There are many tools you can use for this task, including this one: http://regex.info/exif.cgi.
To learn more about using Google Earth for verification, watch this case study from First Draft.
To see the full suite of Google Earth tutorials, click here.
-
![GO801_GNI_AdvancedProtectionProgram_Title_Card.jpg]()
-
![ProtectYourElectionCoverage]()
Protect your election coverage
LessonIn this module, we will look at tools to protect and secure your election coverage -
![GoogleMyMaps_ShowWhereStoriesHappen]()
Google My Maps: Show where stories happen.
LessonGive important context by building interactive maps.